Note: Please read the article carefully before doing it! If in the process of using you have any errors, such as a link download error, slow loading blog, or not accessing a certain page on the blog ... then please inform me. here slightly. Thanks!
Content Table of Contents
- I. Instructions for cleaning up Win 10 after upgrading
- #first. Clean up through Storage sense
- #2. Clean up Windows 10 with the Free up space now feature
- # 3. Clean up Windows 10 via Disk Cleanup
- # 4. Delete the Windows.old file after upgrading
- II. Combining a few articles helps your computer run smoother
Yes, Microsoft's version of Windows 10 Version 1809 has been around for a while. However, today I have just upgraded it, namely I upgraded from Version 1709 to Windows 10 Version 1809.
There are many ways to upgrade Windows 10 to the latest version , but this time I made the update via OTA (Update feature is available on Windows). And as you know, with this Upgrade method on your hard drive will create a file above is Windows.old, containing the old operating system so you can restore the operating system if unfortunately the process of lifting level of failure.
And this file is quite large, like me, the size of this backup file is> 30GB. If the space on your operating system has little free space, it may be red after upgrading
Okay, and in this tutorial I will share with you the best ways to clean up the mess after upgrading to the latest Windows 10.
I. Instructions for cleaning up Win 10 after upgrading
There are many ways to do this, but the articles are quite scattered on the blog. Therefore, this article will summarize so that you have the most comprehensive view.
Note: My advice is to use it a few days before deciding to clean up in the ways below. The goal is for us to monitor whether this upgraded operating system is running smoothly, so that there is a way out. OK!
In the event of an upgrade after a lot of errors, or for some reason that you do not like the new version, you can downgrade Windows 10 to the old version .
If the C drive (the operating system drive) of your computer has a lot of free space, you probably don't need to do this, because this Windows.old folder will be automatically deleted within 30 days. Well, I just noticed a few things like that, remember what I will say later 🙂
#first. Clean up through Storage sense
Perform:
+ Step 1: Press the key combination to open the interface . Or you can do it manually by clicking on the button => click .
+ Step 2: At the interface you choose => select next => and select Change how we free up space automatically as shown below.
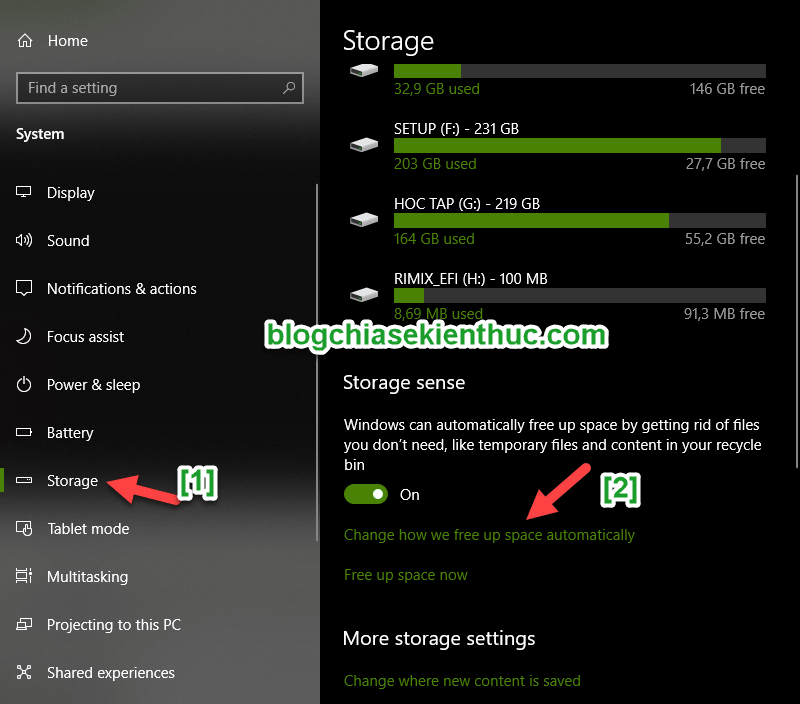
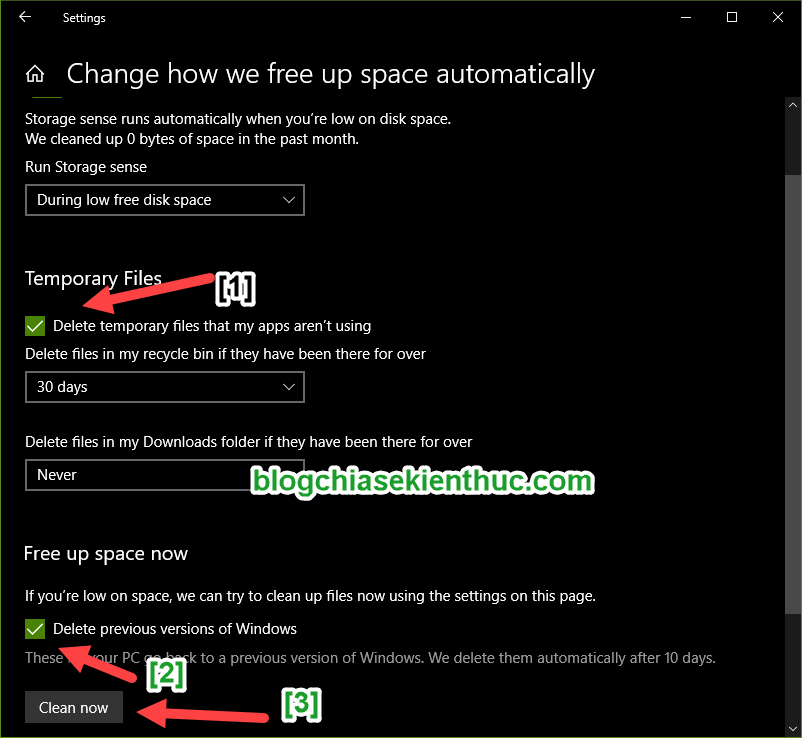
+ Step 3: Next, select the section:
- Delete the files temporary that my apps aren't using: Delete the temporary files that my app doesn't use (By default, it will automatically delete in 30 days, or this part you can reset it for OK).
- Delete previous version of Windows: Delete previous versions of Windows
=> Then click to perform deletion.
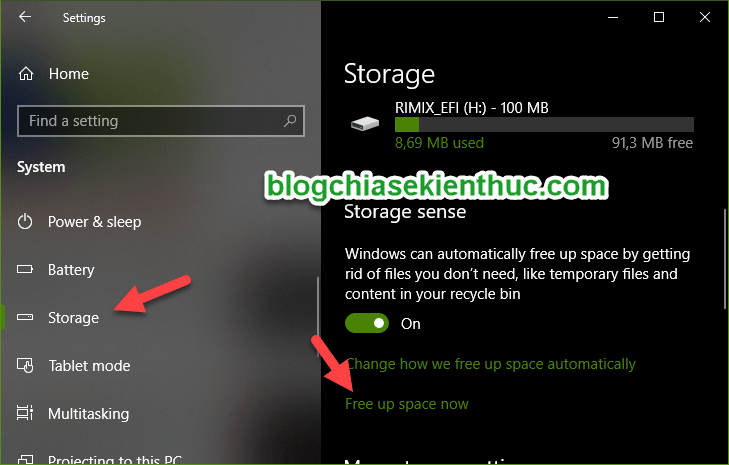
#2. Clean up Windows 10 with the Free up space now feature
+ Step 1: Also at interface => you select the feature as shown below.
This is actually just a new interface of the Disk Cleanup interface before.
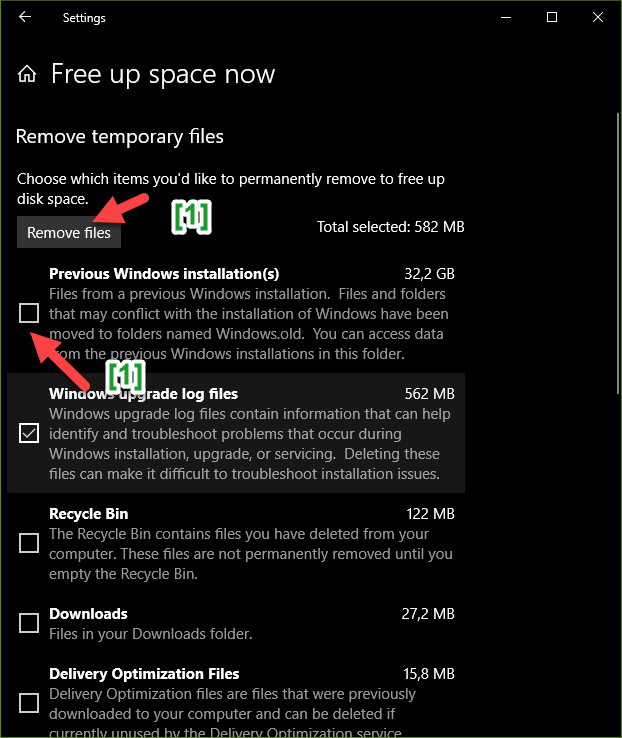
+ Step 2: You have to wait a long time (about 5 minutes) for the computer to scan junk files and backup files.
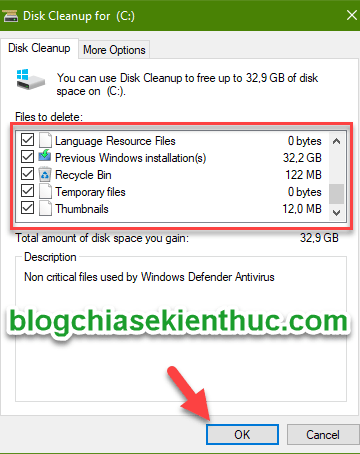
As shown below, you can see that the file is the backup file of the old operating system, which is up to 32 GB. Please check this file or you can select all items (if you want).
=> Then click to perform deletion.
# 3. Clean up Windows 10 via Disk Cleanup
In fact, I have detailed instructions on how to use Disk Cleanup on Windows . Therefore, if you want to learn more, read the article again.
In this article, I will guide you quickly.
+ Step 1: Press the key combination to open up. Here you right-click the drive containing the operating system (usually drive C) => and select as shown below.
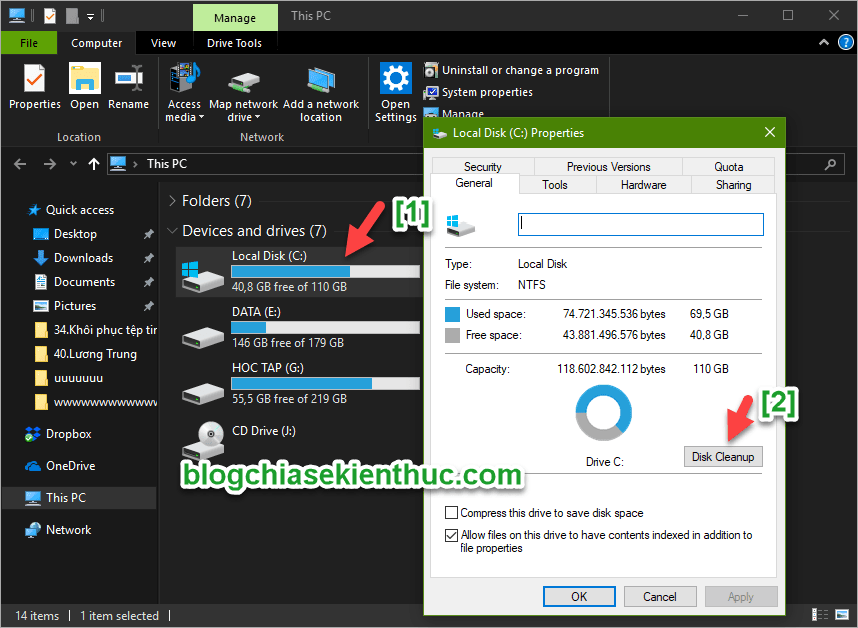
+ Step 2: Next, click on the item to perform the scan of system junk files. You may have to press twice on that item , because for the first time it may disappear 🙂

+ Step 3: Here it is, found the backup file with the name . Please check this box or check all (if you want) => and click on the button to delete.
The deletion process will be quite long for you guys, so please pay attention to do it in your spare time. Because just delete and work on the computer will not be good for the computer at all.
# 4. Delete the Windows.old file after upgrading
Actually when you delete the Backup file with the name , you have already deleted this folder . The way to do it is not different!
And I also have a detailed tutorial, you can refer here: Instructions for deleting Windows.old folder on Windows 7/8/10
II. Combining a few articles helps your computer run smoother
On the blog I have shared a lot of ways to optimize your computer so you can use it in the most smooth and stable way. And if you like, you can look at the following articles, maybe it will help you a lot 😀
- Computer acceleration - 12 steps to get a new computer
- [TUTs] How does the computer always work well?
- [Tuts] How to delete junk files on your computer, clean up computer trash most effectively
- [Tuts] Windows 8 / 8.1 optimization guide to play the smoothest Game
And there are many other articles, you can refer to the section of computer tricks offline!
Epilogue
Yes, so I have just detailed instructions for you how to clean up Win 10 after Update to the latest version.
And I can make sure your computer will be as clean as new and regain a lot of storage space for that operating system drive.
Hope this article will be useful for you, wish you success!
Kien Nguyen - Blogchiasekienthuc


")
 Haven't Tried")


Post a Comment
Post a Comment