Note: Please read the article carefully before proceeding! If in the process of using you encounter any errors, such as broken download links, slow loading blog, or unable to access a certain page on the blog ... then please inform me here. Thanks!
When you insert pictures into Word files, and you want to move the images to any position you want, what to do? Yes, if you haven't edited the image, then you won't be able to move the image.So the question is, how do we adjust the properties of the image so that we can move it? That is the main content of this article. In this article, I will show you how to adjust the properties of the image to move it to the position you want in Word.
Read more:
First you insert pictures into Word, then depending on the purpose you use the following ways:
#first. Move images in Word with Wrap Text
Perform:+ Step 1: Click on the photo => and then on Tab
Fomat. Or double-click on the image, then Word will be moved to the Tab Format.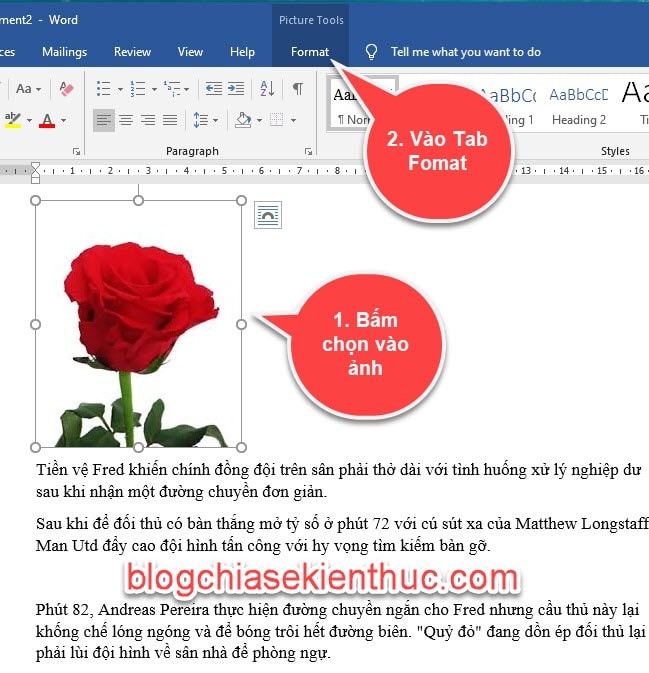
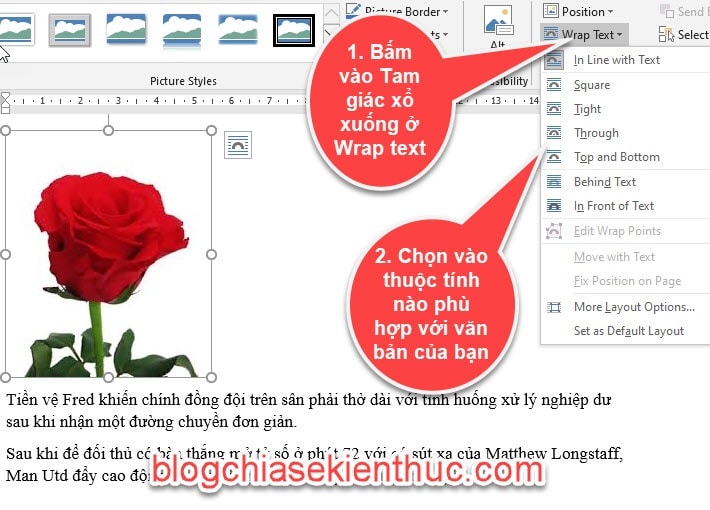
+ Step 2: Next, you click on the triangle down button at
Wrap Text => Now the image properties will appear, select the attribute you want.Note: The attributes have illustrations next to you should observe and choose to suit your needs.Here I will explain to you some of the commonly used attributes, the remaining attributes you choose and observe to have a more intuitive look.
- In the Line with Text: With this option, the image will be treated as a text character.
- Square: With this option, text will wrap around the image you have inserted.
- Top and Bottom: Image will be 1 paragraph above text and 1 paragraph below paragraph.
- In Front of Text: With this option, the image will be in front of the text and cover the text.
- Behind Text: With this option, the image will be behind the text.
+ Step 3: After selecting the attribute is complete, here I select the property
Through for photos, at this time you click on the image => then hold the mouse and drag and drop to the position you want.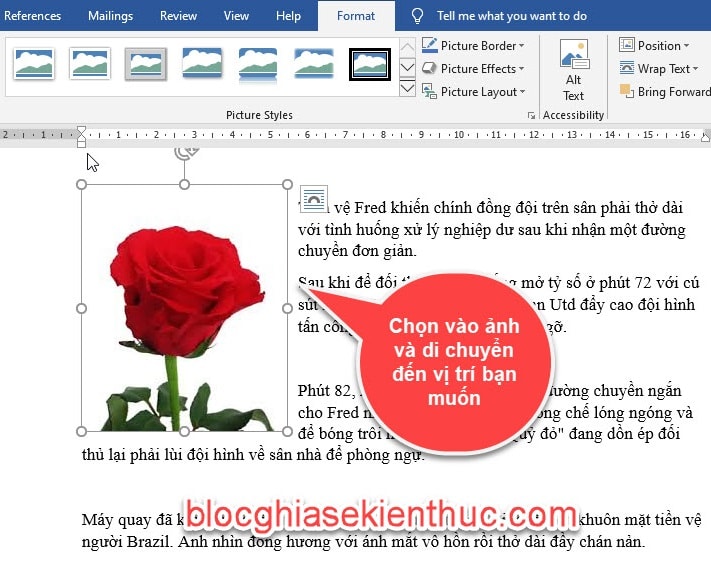
#2. Move pictures that are pre-set in Word
Position has built-in image position to help you quickly move images to positions in Word documents. The text automatically wraps around images and other objects and is still easy to read.Perform:
+ Step 1: Select on image => then go to Tab
Format => and select Position => Next select the position where you want the image to move in the text, the image will immediately move to the position you choose.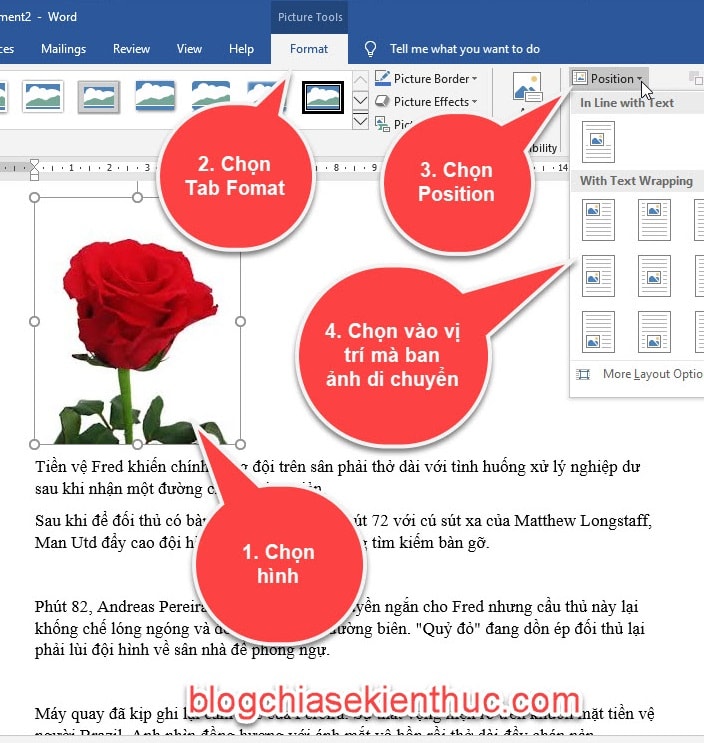
+ Step 2: You can adjust many different options by clicking on
More Layout Options..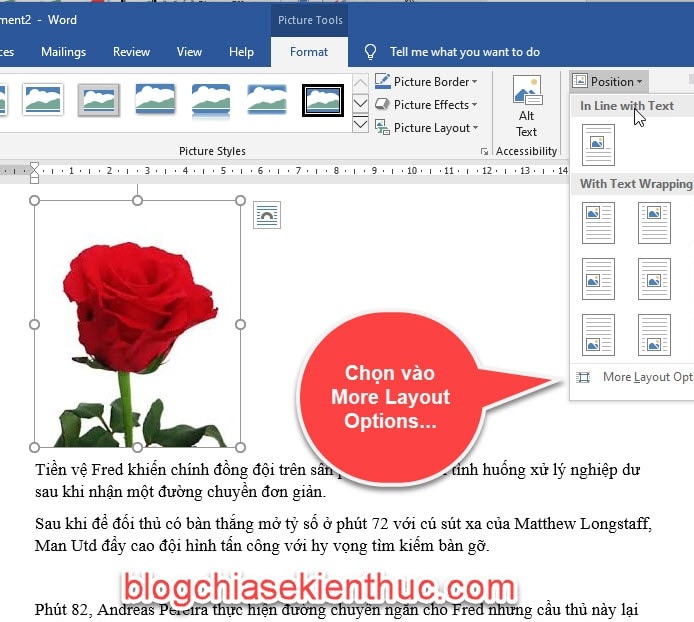
+ Step 3: In the dialog box
Layout => Click on the card Text Wrapping => you can choose many different options, it is the same as in Wrap Text ok => after selecting the attribute then click OK to set the location for the image.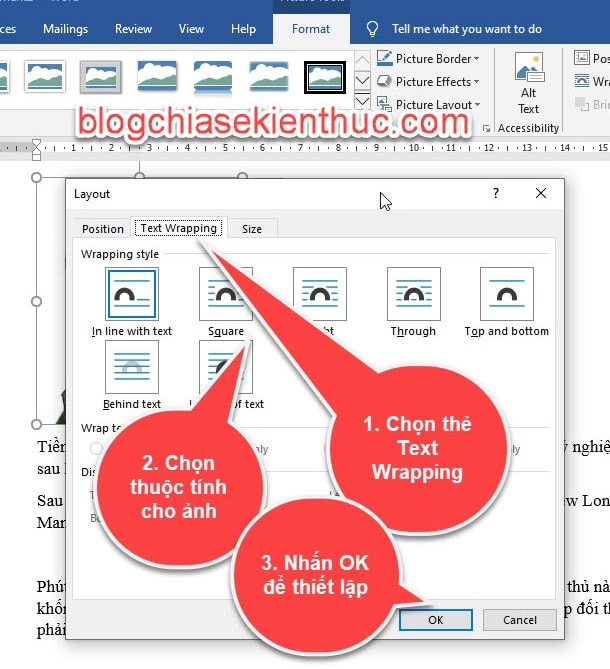
To return the image to the original default => you select the attribute in
In line with Text is to be.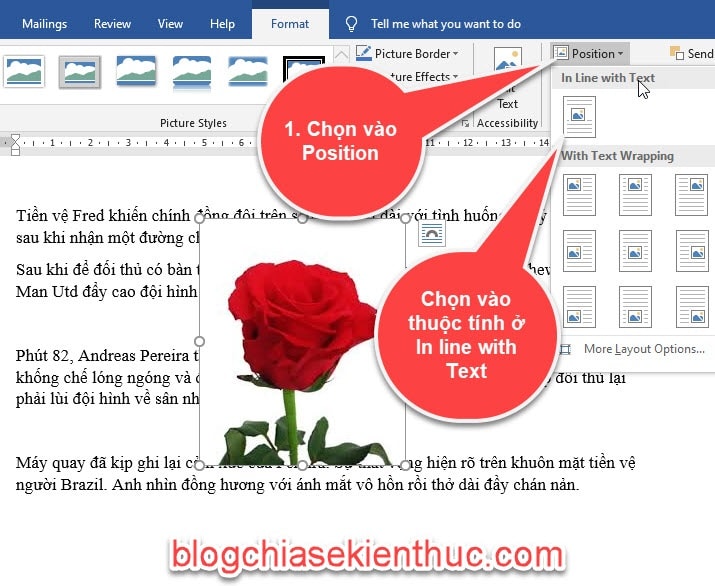
# 3. Change the image position with the Aglin alignment
For this way, we can easily edit, change the image position to the left, right, center on the line ... you use the featureAlign to align.Perform:
Select the image to align position => then go to Tab
Home => Drag the tool group Paragraph => Select the alignment of the image (left, right, center ..)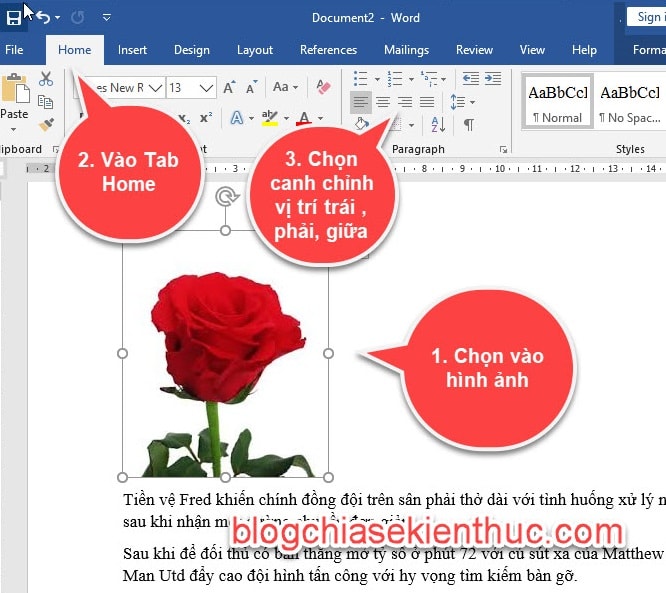
# 4. Conclude
So in this article I have very detailed instructions for you 3 How to move images in Word Alright then.With the above ways, you can easily align the position of the image in the text, depending on the case that you choose the effective way.
Hope this article will be helpful to you. Good luck !
CTV: Ngoc Cuong - Blogchiasekienthuc.com


")
 Haven't Tried")


Post a Comment
Post a Comment