Note: Please read the article carefully before proceeding! If in the process of using you encounter any errors, such as broken download links, slow loading blog, or unable to access a certain page on the blog ... then please inform me here. Thanks!
Yes, in the previous article, I gave you very detailed instructions on how to integrate USB 3.0 driver into the Windows 7 installation extremely quickly with the available tool.If you have not read that article, you can check it out here:
In this article, I will share with you how to integrate more USB 3.0 drivers into the Windows 7 installer with the DISM command in the familiar CMD window. And the way to do it is very simple, and I believe that anyone can do it.
Okay, let's get started now.
#first. What to prepare?
1.1. Create a folder named as USB3 in the drive partition D, E .. (it's up to you). Here I will create the directoryUSB3 in the drive partition E Please.1.2. Continue, in the directory USB3 You continue to create 2 subdirectories named driver and mount. This is very simple, isn't it 😀
1.3. Download the original Windows 7 installer, if you already have it, but if not, you can download it here or here!
1.4. Download the USB 3.0 driver corresponding to the machine, if you do not know then you can check the following: Right-click
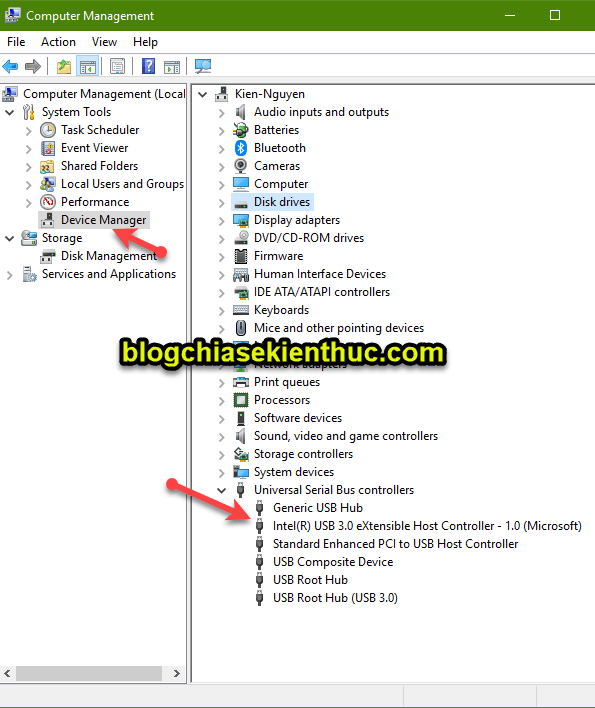
This PC => select Manage => then select continue Drvice Manager as shown below.Now you pay attention to the driver of the USB. As you can see, my computer is on Intel USB 3.0 controller.
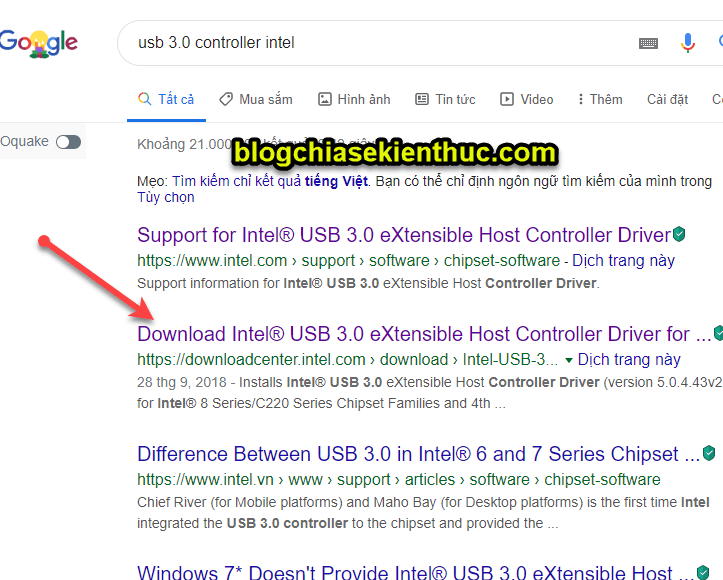
Now I will go on Google Search to search for Intel USB 3.0 driver. Search syntax as shown below => then access the results to download the file.
For other brands' drivers, do the same thing.
Other common USB3.0 controllers are:
- ASMedia
- Etron
- Fresco Logic
- HCSwitch
- Intel
- Renesas
- Texas Instruments
- Via
#2. How to add USB 3.0 driver to the Windows 7 installer
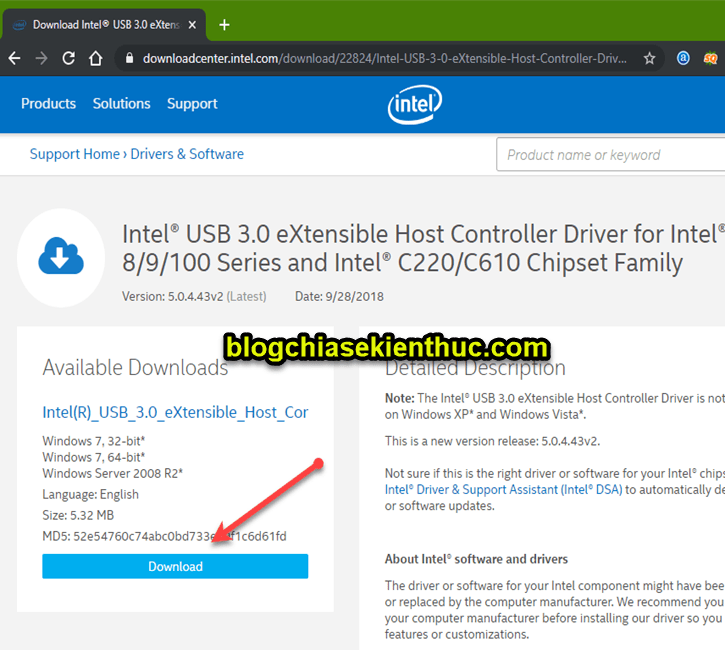
+ Step 1: After downloading, please extract the file. Then access the driver folder of the downloaded file (access to 32bit or 64bit versions depending on the version of Windows 7 you want to integrate.)For example, the driver file I have just downloaded, I will access the following link:
Intel (R) _USB_3.0_eXtensible_Host_Controller_Driver_5.0.4.43_v2 DriversWin7x86
Because I want to integrate USB 3.0 for Windows 7 32bit so I will open the folder x86.
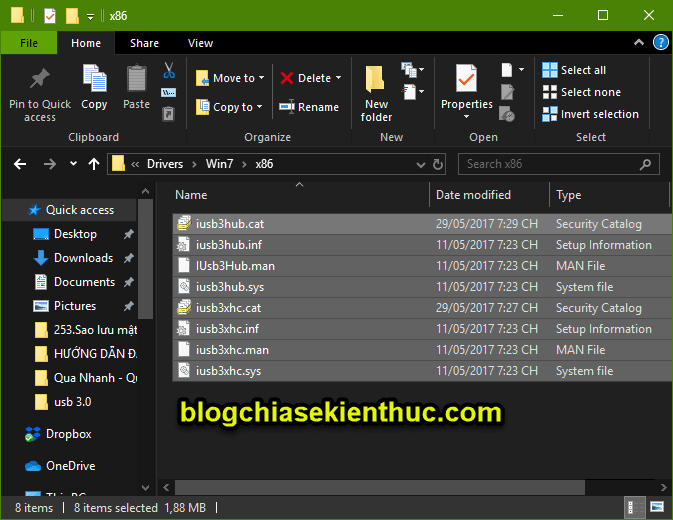
+ Step 2: Then copy all the files ending in.inf, .sys, .cat…. Generally copy all the files similar to the picture above into the folder driver located in the directory USB3 that we created in preparation.
In the driver folder, there will be files .cat .inf .sys:
- File .inf A file containing information and commands to be run.
- File .cat The file contains the certificate.
- File .sys is the driver.
Recommended reading: How to display file extensions on Windows XP / 7/8/10

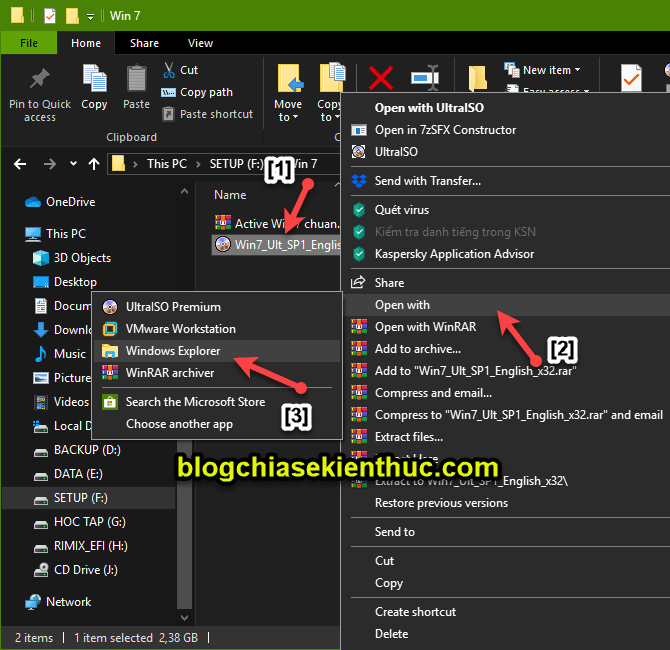
+ Step 3: Next, mount the Windows 7 installer to the virtual drive. With Windows 8 or Windows 10, you can right-click the Windows 7 installer => and then select
Open with => and select Windows Explorer.See more: How to Mount a file to a virtual drive for all versions of Windows
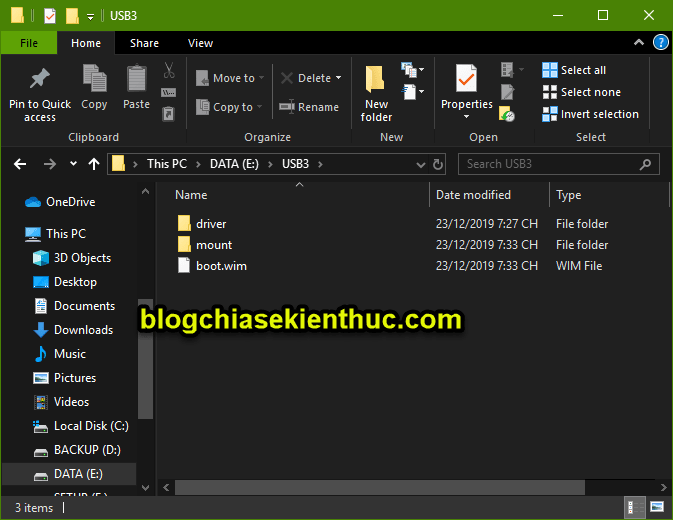
+ Step 4: You access the directory sources on the virtual drive you just Mount => then copy the file
boot.wim Go to the USB3 folder you created in the preparation step.
After the copy is complete, you will be like this.
+ Step 5: You open the CMD window with Admin privileges so we can start using the command. Enter the following command in turn and press
Enter to perform.E:=> Then you wait for the program to perform Mount file
cd USB3
dism / mount-wim /wimfile:boot.wim / index: 2 / mountdir: mount
boot.win. Run to 100% and have the success message as shown below OK.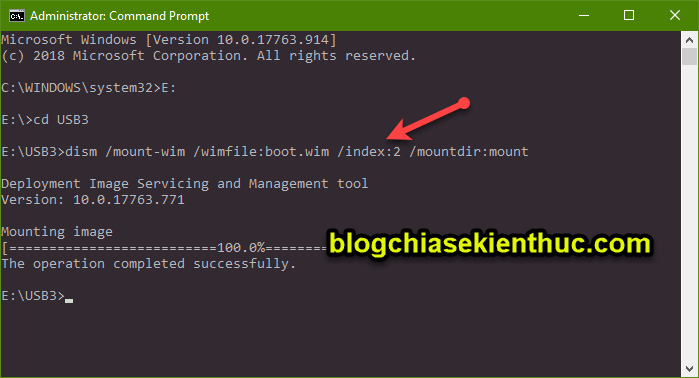
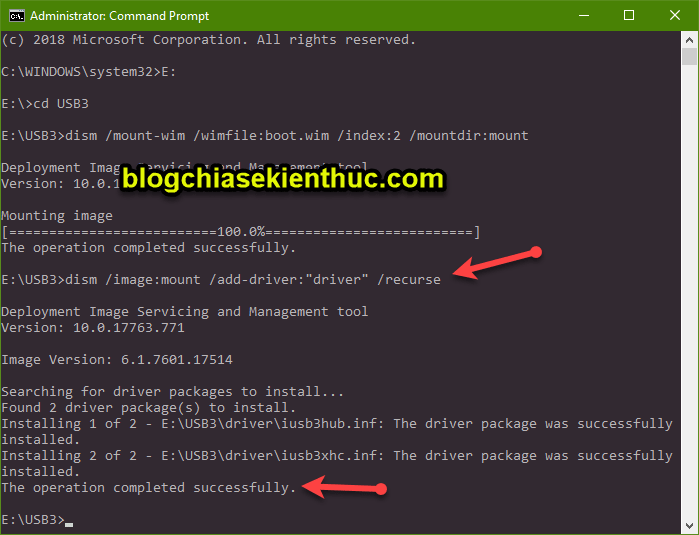
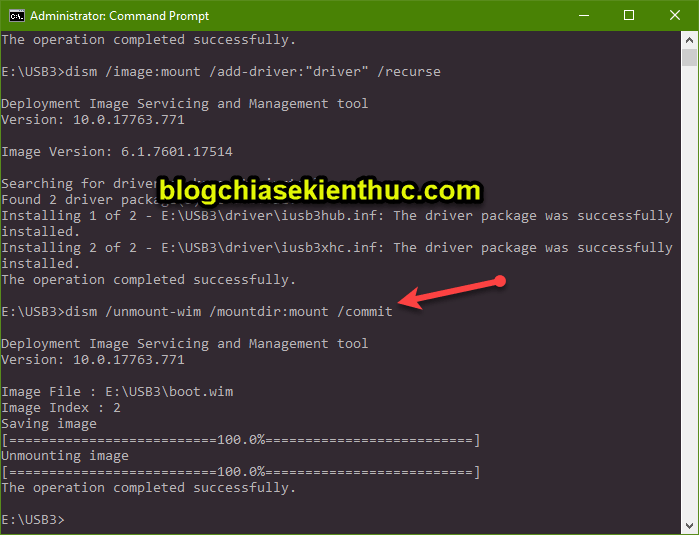
+ Step 6: Continue, we will execute the command to add the driver to the file
boot.win. You use the following command => press Enter:dism / image: mount / add-driver: "driver" / recurse=> Wait for the run to finish.
+ Step 7: Now we will execute the Save and Unmount file command. You use the following command:
dism / unmount-wim / mountdir: mount / commitYou also wait for it to complete. That's it then.
+ Step 8: If you want to repackage the modified Windows installation file, follow this guide!
# 3. Download the Windows 7 installer with built-in USB 3.0 driver
Yes, a quicker and faster way for those who don't want to waste time is to download the Windows 7 installer (both 32bit and 64-bit) with built-in USB 3.0 driver.You can visit here to download offline. I have shared in the previous article already (in the section III there)!
# 4. Epilogue
Yes, so I have detailed instructions for you How to add a USB 3.0 driver to the Windows 7 installer by using the DISM command in CMD then okay.This is a pretty good way that you can apply. This way I consult on VNZ, find it quite good to play with and share back to you.
Hope that it will be helpful to you. Good luck !
Kien Nguyen - Blogchiasekienthuc.com


")
 Haven't Tried")


Post a Comment
Post a Comment