Note: Please read the article carefully before proceeding! If in the process of using you encounter any errors, such as broken download links, slow loading blog, or unable to access a certain page on the blog ... then please inform me here. Thanks!
In PowerPoint, depending on the type of object and the purpose of the presentation, we can add different effects to increase the aesthetics, the art and to get the attention and increase the attention of the viewer.Therefore, in this article I will guide you insert shaded effect in PowerPoint For objects such as images, text, etc. In a very simple way, all you need to do is follow the instructions. Now let's get started.
Read more:
#first. Add shaded effect to the image
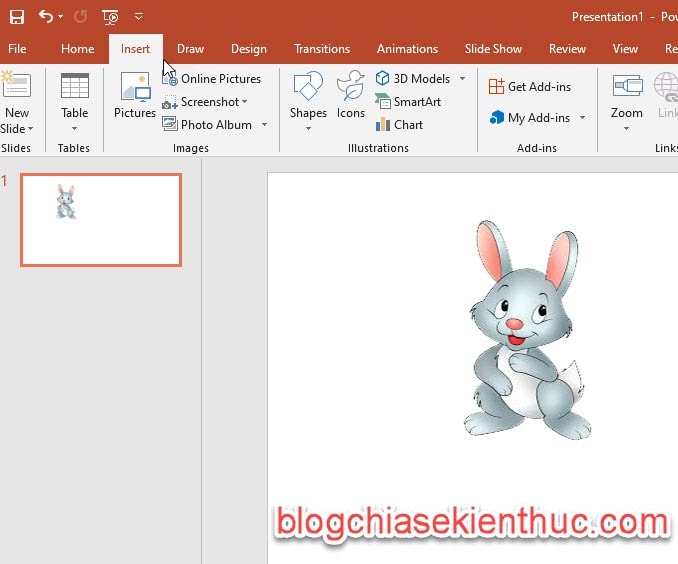
Note: Firstly, if you want to create a nice blur effect for the object, the inserted image must be empty (transparent background), the image is in PNG format, if you want to find PNG images, then you Go to Google Search, type the name of the image you want to search, and then add PNG behind it.Example: I will try to insert a picture of rabbit in PNG format with a transparent background.
Perform:
+ Step 1: Go to Tab
Insert => click on Pictures to insert pictures into PowerPoint.
The image after being inserted will look like this ..
+ Step 2: Now to add effects to the image, please ...
Select the newly inserted image => then click on Tab
Format => then click on Picture Effects.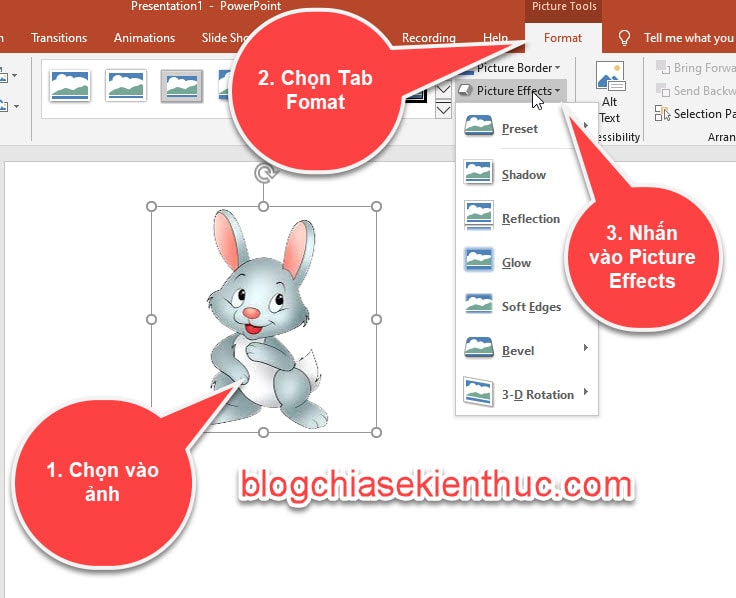
+ Step 3: You choose to
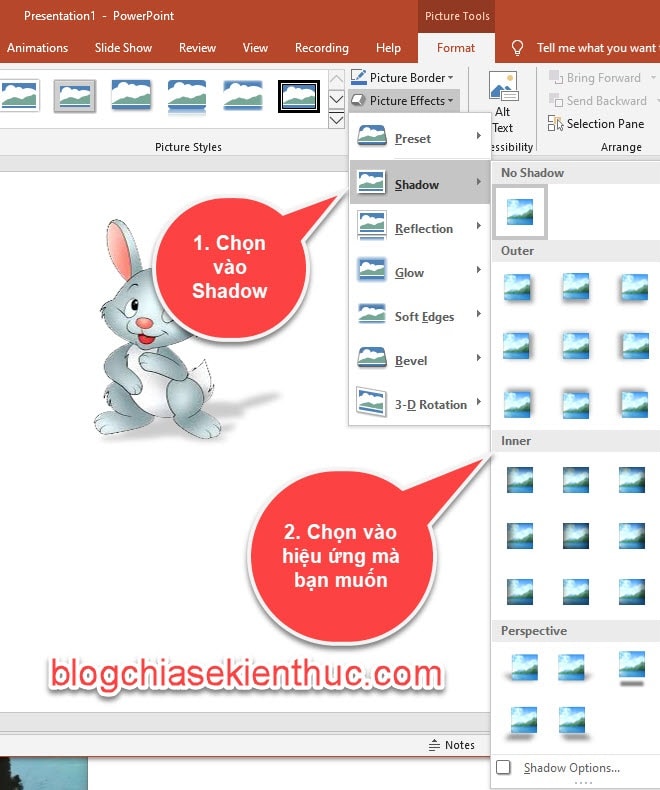
Shadow, there will be ghosting effects. As soon as the mouse clicks on a certain type of effect, the image will be applied for you to preview. Here I will choose a demo of a shadow effect.Shaded effect will be divided into groups such as:
- No Shadow: This group will have no ghosting effect.
- Outer: This group inserts a shaded effect outside the object adjacent to the border.
- Inner: Shaded effect inside object close to the border.
- Perspective: This group is a drop shadow effect.
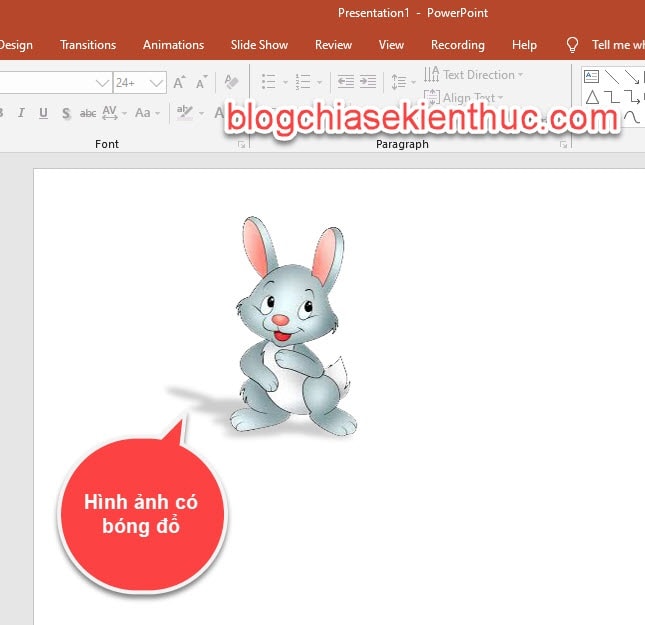
The result is an image with a drop shadow like the image below.
#2. How to insert shadow effect for text
Perform:+ Step 1: Enter the text of the text into the Slide. For example, in the image below ...
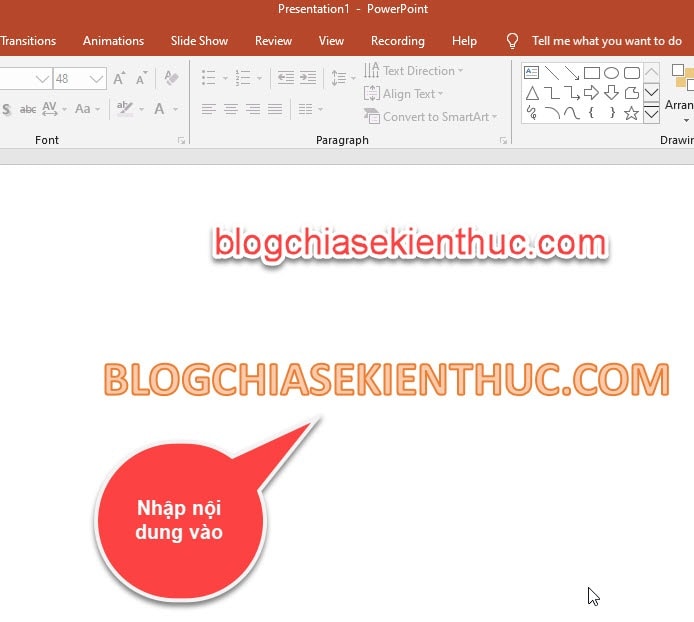
+ Step 2: Select content => and then click Tab
Format => then click continue Text Effects.
+ Step 4: Select on
Shadow, there will be effects available, just select an effect you want to use.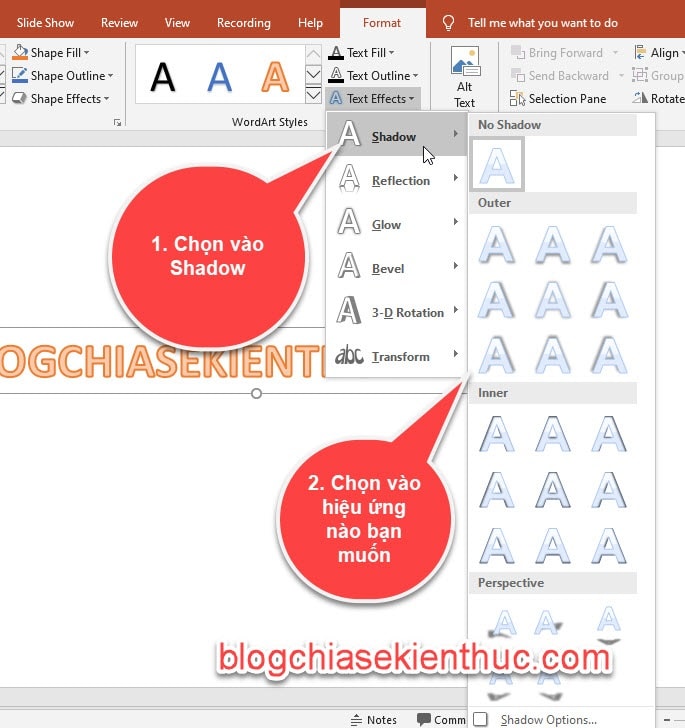
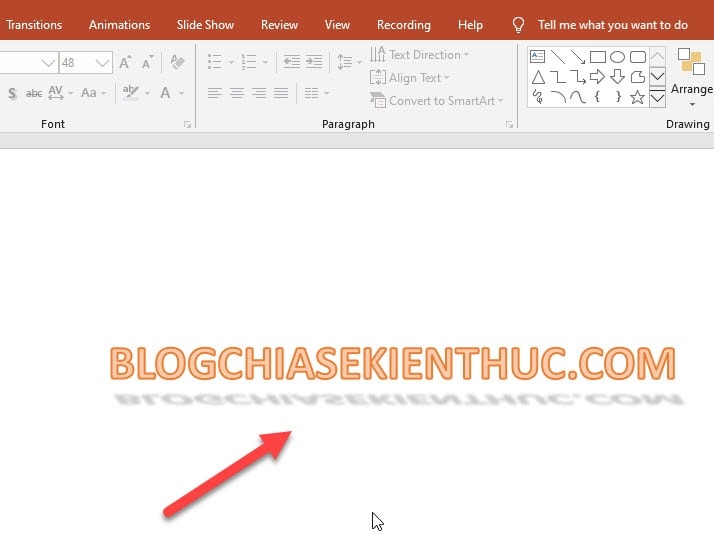
The result is as shown below:
//* explore more* //
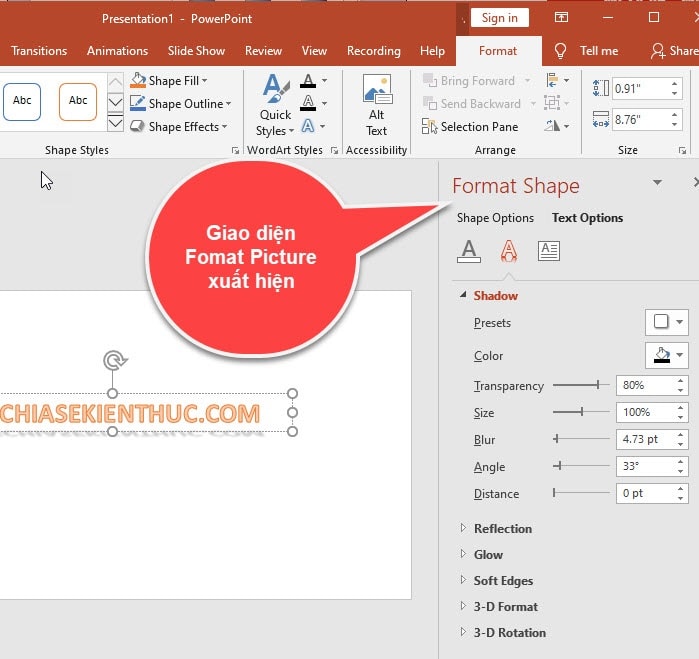
In addition, you can also customize the effect for the text, by clicking on the Shadow Options feature.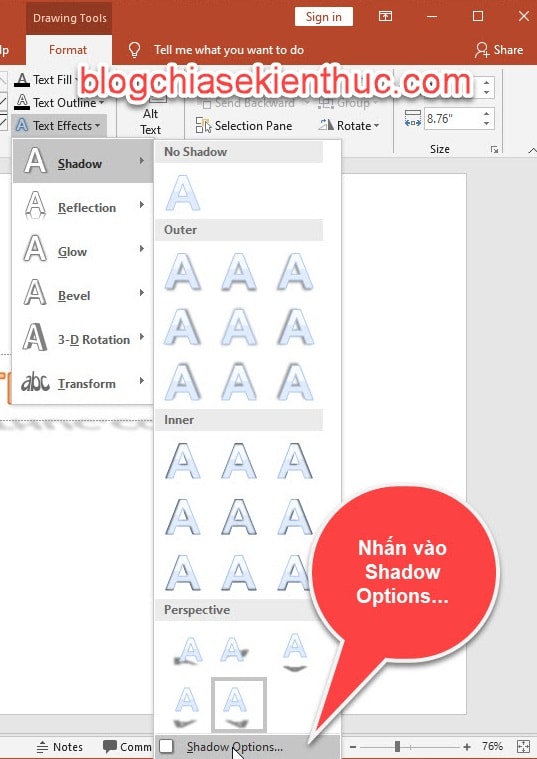
In Format Picture interface, you will have the options to customize the blur effect as follows:
- Presets: Reset shaded style for images.
- Transparency: Repeat the blur level for the object.
- Size: Change the size for shaded objects.
- Blur: Customize the level of blurring for shadows.
- Angle: Repeat the angle of ghosting with the subject again.
- Distance: Change the distance between ghosting and image.
// * end of reference * //
You can customize the above changes to suit your intended use. If you do not want to use ghosting for the object anymore, we go through step 5+ Step 5: Select object => then go to Tab
Format => click on Text Effects => then click Shadow => click on No Shadow is done.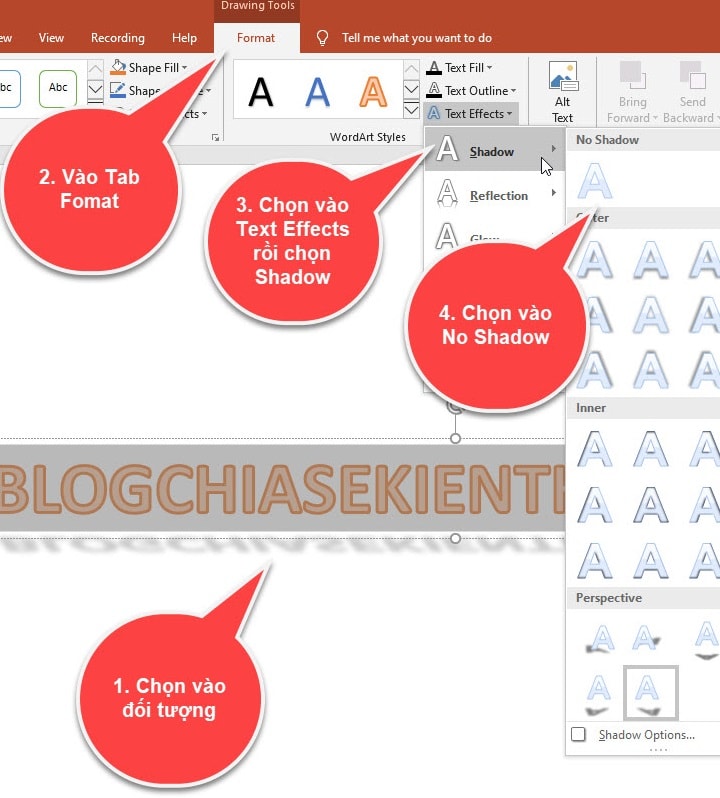
# 3. Conclude
So in this article I have guided you how to create shadow effects for images, or text on Powerpoint Alright then.If you skillfully apply these effects to your presentations, it will be very effective, it increases the attractiveness as well as the unique of your presentation.
Hope this article will be helpful to you. Good luck !
CTV: Ngoc Cuong


")
 Haven't Tried")


Post a Comment
Post a Comment