n this article, we are going to see how we can insert a working table of contents in blogger that too with a single shortcode. Blogger is a platform where there are lots of limitations compared to WordPress where a single plugin would do the job.
Now onwards you don’t have to depend upon long codes and javascript which would slow down your website. We present you the first shortcode based automatic table of content for blogger
Features of our Plugin
We have designed this plugin especially for blogger such that no server load or third-party scripts are loaded besides the base jquery. And it only loads after your entire page is loaded so that other important content is loaded first and making sure our code doesn’t hurt them.
- Complete Shortcode based
- One time setup
- Optimized Code for Performance
- Toggle functionality
- Minimal CSS
And the best thing is, It’s completely free and licensed under Creative Commons Attribution-NonCommercial-ShareAlike 4.0 International License.
Benefits of TOC
Table of Contents provide lots of benefits for a blog like it will help visitor to get an idea of your article. If your article is lengthy it would be a helpful thing for a reader to navigate between sections.
This can catch lazy readers to stay in your article and boost your CTR, this is not all the benefits there are lots of SEO benefits that we will discuss below.
SEO Benefits
There are lots of benefits in terms of SEO like Jump to links and one-line Sitelinks below articles. When you choose a template you would probably choose SEO optimized Blogger templates for your blog just like that TOC helps a lot in SEO.
Jump to Links in Google Search
Jump to links is very useful when you wrote a lengthy article and one of your sub-keywords is ranked on google. Jump to links would catch visitors quickly as it would match the searched keyword and take them directly to the portion of the particular article.

One-line Sitelinks
One-line sitelinks works like the ordinary sitelinks but the only difference is that it would be listing the contents in your TOC plugin. So whatever you wrote in your article would be highlighted below your post.
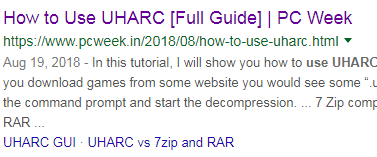
Table of Contents in Blogger
You have to configure little things before using the shortcode. This is a onetime job and after that, don’t have to worry about it.
First of all, make sure that jQuery and Font Awesome Icons are already installed in your blog, it is usually present in most of the themes and if you are not sure about this just open your theme and search for jquery in the search bar and same for the font awesome icons.
How to Add Table of Contents in Blogger
Please follow the instructions carefully, and always make sure that you have kept a backup of your theme in case of any errors. This step is for non AMP versions.
1. From your blogger dashboard click Edit HTML in Theme panel and paste the below code after the </body> tag.
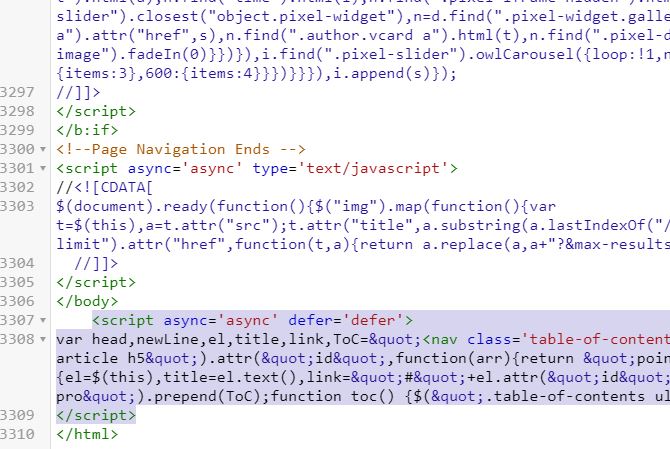
<script async='async' defer='defer'>
var head,newLine,el,title,link,ToC="<nav class='table-of-contents' role='navigation'><h4 onclick='toc()'>Contents</h4><ul style='display:none'>";$("article h2, article h3, article h4, article h5").attr("id",function(arr){return "point" + arr;});$("article h2, article h3, article h4, article h5").each(function(){el=$(this),title=el.text(),link="#"+el.attr("id"),ToC+=newLine="<li><a href='"+link+"'>"+title+"</a></li>"}),ToC+="</ul></nav>",$(".toc-pro").prepend(ToC);function toc() {$(".table-of-contents ul").toggle();}
</script>
2. After that paste the below CSS in between <style> or <b:skin><![CDATA[ and <style> or ]]></b:skin>
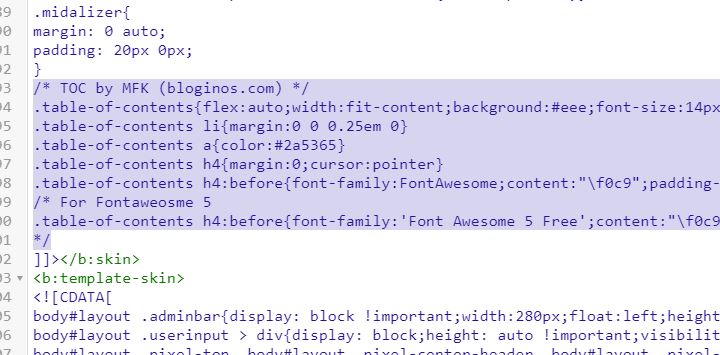
/* TOC by MFK (bloginos.com) */
.table-of-contents{flex:auto;width:fit-content;background:#eee;font-size:14px;padding:11px;margin:8px 0 30px 0}
.table-of-contents li{margin:0 0 0.25em 0}
.table-of-contents a{color:#2a5365}
.table-of-contents h4{margin:0;cursor:pointer}
.table-of-contents h4:before{font-family:FontAwesome;content:"\f0c9";padding-right:7px;}
/* For Fontaweosme 5
.table-of-contents h4:before{font-family:'Font Awesome 5 Free';content:"\f0c9";padding-right:7px;}
*/
3. After Saving you’re theme, got to your blogger post editor and switch to HTML mode. Use this shortcode to insert the TOC in any of your posts.
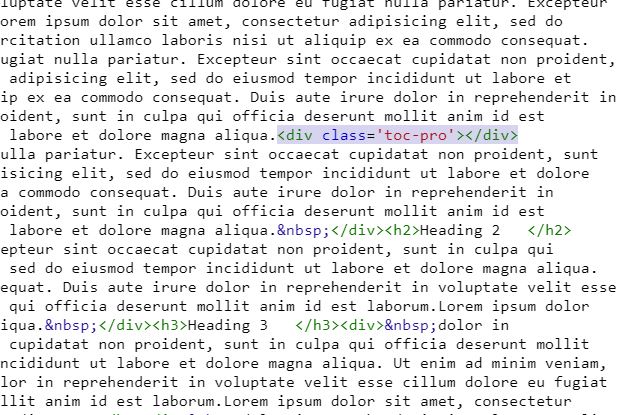
<div class='toc-pro'></div>
That’s all, Now you don’t have to worry about any other code just use the above shortcode wherever you want the TOC to appear. If you are not using AMP skip the below section.
Note that you have to paste this shortcode in every post that you want to show the TOC.
Video Demonstration
Plugin Support for AMP Themes
It’s a fact that AMP doesn’t support all Javascript codes, you can refer the official page for all supported elements here. There is no way to run TOC over valid AMP HTML pages. But we can run the TOC in desktop versions without affecting valid AMP pages.
You will not get the full shortcode benefit as above, but this is optimized for AMP themes and would be better because it’s built with AMP elements and Javascript. It’s a foolish thing to burden our AMP themes to load jQuery unnecessarily.
The above code depends upon the jQuery which is not at all needed for an AMP theme so we have created a TOC that is build with pure Javascript and AMP elements.
If you are a beginner you will find a little bit hard to understand this, no problem just follow below steps to insert a TOC in your AMP themes.
How to Add Table of Contents in AMP Blogger
Please note that this step is only for AMP themes and would not work in non AMP versions. For non AMP version please follow the above section.
1. From your Blogger dashboard go to Theme and click Edit HTML and paste the below code before the </body> tag
<b:if cond='not data:blog.isMobileRequest and data:view.isPost'>
<script>
var TOCpro=i=headlength=gethead=0;for(headlength=document.getElementById("myArticle").querySelectorAll("h2, h3, h4, h5").length,i=0;i<headlength;i++)gethead=document.getElementById("myArticle").querySelectorAll("h2, h3, h4, h5")[i].textContent,document.getElementById("myArticle").querySelectorAll("h2, h3, h4, h5")[i].setAttribute("id","point"+i),TOCpro="<li><a href='#point"+i+"'>"+gethead+"</a></li>",document.getElementById("toc-pro").innerHTML+=TOCpro;
</script>
</b:if>
2. Paste the CSS between the <style amp-custom='amp-custom'> and </style> and Save the theme.
/* TOC */
.toc{font-size:20px;font-weight:600;cursor:pointer;background-color:#edeef1;padding:7px 11px;width:fit-content;margin:15px 0}.toc:focus,.toc li:focus{outline:none}.toc svg{vertical-align:middle;width:20px;height:20px}
#toc-pro {background-color:#edeef1;margin:0;padding:0 5px 0 11px;width: fit-content;}#toc-pro a{color:#222}#toc-pro li{font-size: 15px;font-weight:400}
3. Before Saving the theme you have to find the article tag and add an id attribute with id=’myArticle’ and it would look like this and Save your theme.
<article class='post hentry' id='myArticle' itemscope='itemscope' itemtype='https://schema.org/BlogPosting'>
4. After that just go to the post editor and switch to HTML mode and paste the below code to insert TOC in any of your posts.
<div class="toc" on="tap:toc-pro.toggleVisibility" role="button" tabindex="0">
Table of Contents <svg height="18" viewbox="0 0 24 24" width="18"><path d="M12,18.17L8.83,15L7.42,16.41L12,21L16.59,16.41L15.17,15M12,5.83L15.17,9L16.58,7.59L12,3L7.41,7.59L8.83,9L12,5.83Z" fill="#000000"></path></svg>
<div hidden="hidden" id="toc-pro"></div></div>
How our Plugin Works?
if you want to debug the errors or modify the script, this section would be very useful for you. Basically, our code search for an article tag which is usually present in most of the themes but I found some themes doesn’t have this tag.
All the head tags h1 to h5 are fetched inside the TOC block. After that each heading tags are bundled inside the anchor tags and each heading are given an unique id which is also present inside the bunsled anchor tags.
This ID helps us to identify the section. Every heading will have an ID and anchor tags present with it, which will help it to locate the accurate positions. That’s how it works.
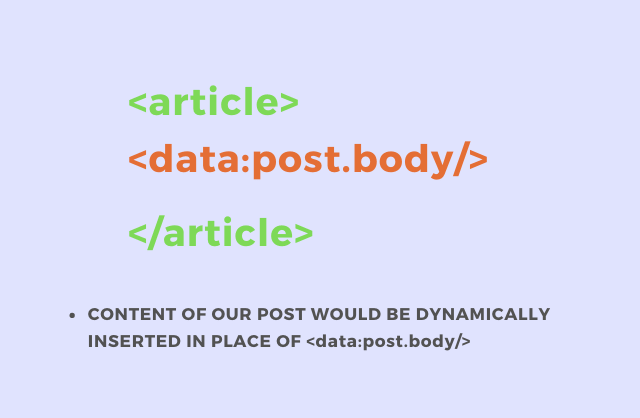
The below image gives you an idea of how blogger displays content dynamically in posts and pages. There may be two <data:post.body/> one for post and other for pages. If your theme doesn’t have an article tag then our plugin will not work.
To solve this issue simply put the <data:post.body/> inside an <article> tag which will fix our problem.
Debugging the Errors
All the codes are optimized and tested in various themes but can’t be the same in every case. If you find any problem with your theme you can comment below we will be happy to help you.
As described in the above case where the article tag isn’t present you can add an article tag as shown in the above section. If nothing is showing after clicking the TOC this is the most probable reason.
Templateify Theme Compatibility
Some users have reported that they are facing some issues while trying to install the TOC plugin, first of all, it’s not the problem of our code. TOC fetches all header tags from h1 to h5 in between <article> and </article> irrespective of content.
Some of the Widgets like the related articles, author section, and other widgets are grouped inside the <article> tag, this causes our code to fetch all the content. And fix is very simple change the tags which you don’t need to h6 or h7.
Fix for Templateify Themes
Change the <h3> and <h2> tag to <h6> and change the CSS accordingly
HTML Section
++++++++++++++++++++++++++++++++++
<h3 class='author-name'>
<a expr:alt='data:post.author.name' expr:href='data:post.author.profileUrl' target='_blank'><data:post.author.name/></a>
</h3>
----------------------------------
<div class='title-wrap related-title'>
<h3><data:allBylineItems.backlinks.label/></h3>
----------------------------------
<h2 class='entry-title'>
<a expr:href='data:post.url'><data:post.title/></a>
</h2>
----------------------------------
CSS Section
++++++++++++++++++++++++++++++++++
.title-wrap > h3{float:left;font-family:var(--body-font);font-size:14px;color:$(wtitle.color);font-weight:700;text-transform:uppercase;margin:0}
Conclusion
I hope that you liked this article on how to add an automatic table of contents in the blogger and found helpful for your blog. If so please share this article with your friends who would also be benefitted. If you find any problem or issues you can comment below.


")
 Haven't Tried")


Post a Comment
Post a Comment