Managing your own Minecraft server is a great experience. Whether you want to play with friends or want to build a community of creative enthusiasts.
That's why at Hostinger we offer dedicated Minecraft hosting to make this goal even simpler.
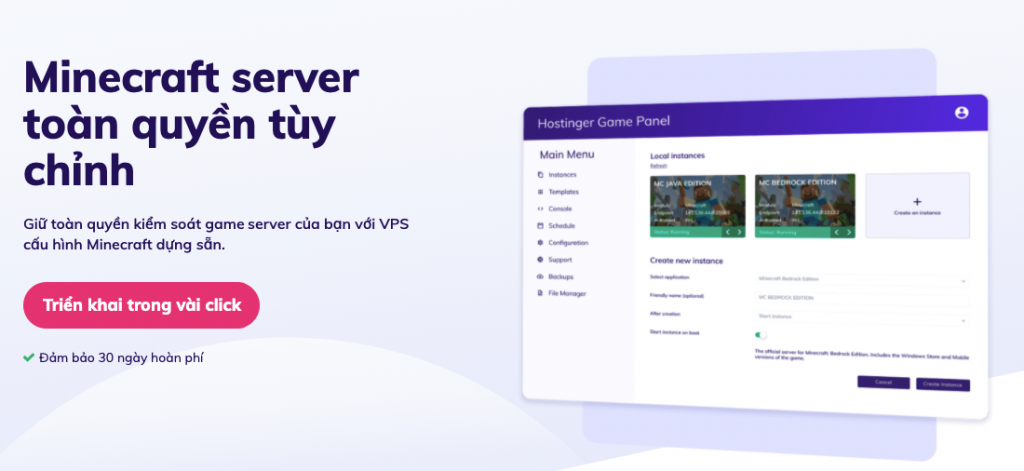
In this guide, we will show you how to buy a separate Minecraft Server plan running on VPS Hostinger and how to configure Minecraft initially in minutes.
Which Minecraft server package do I need to buy?
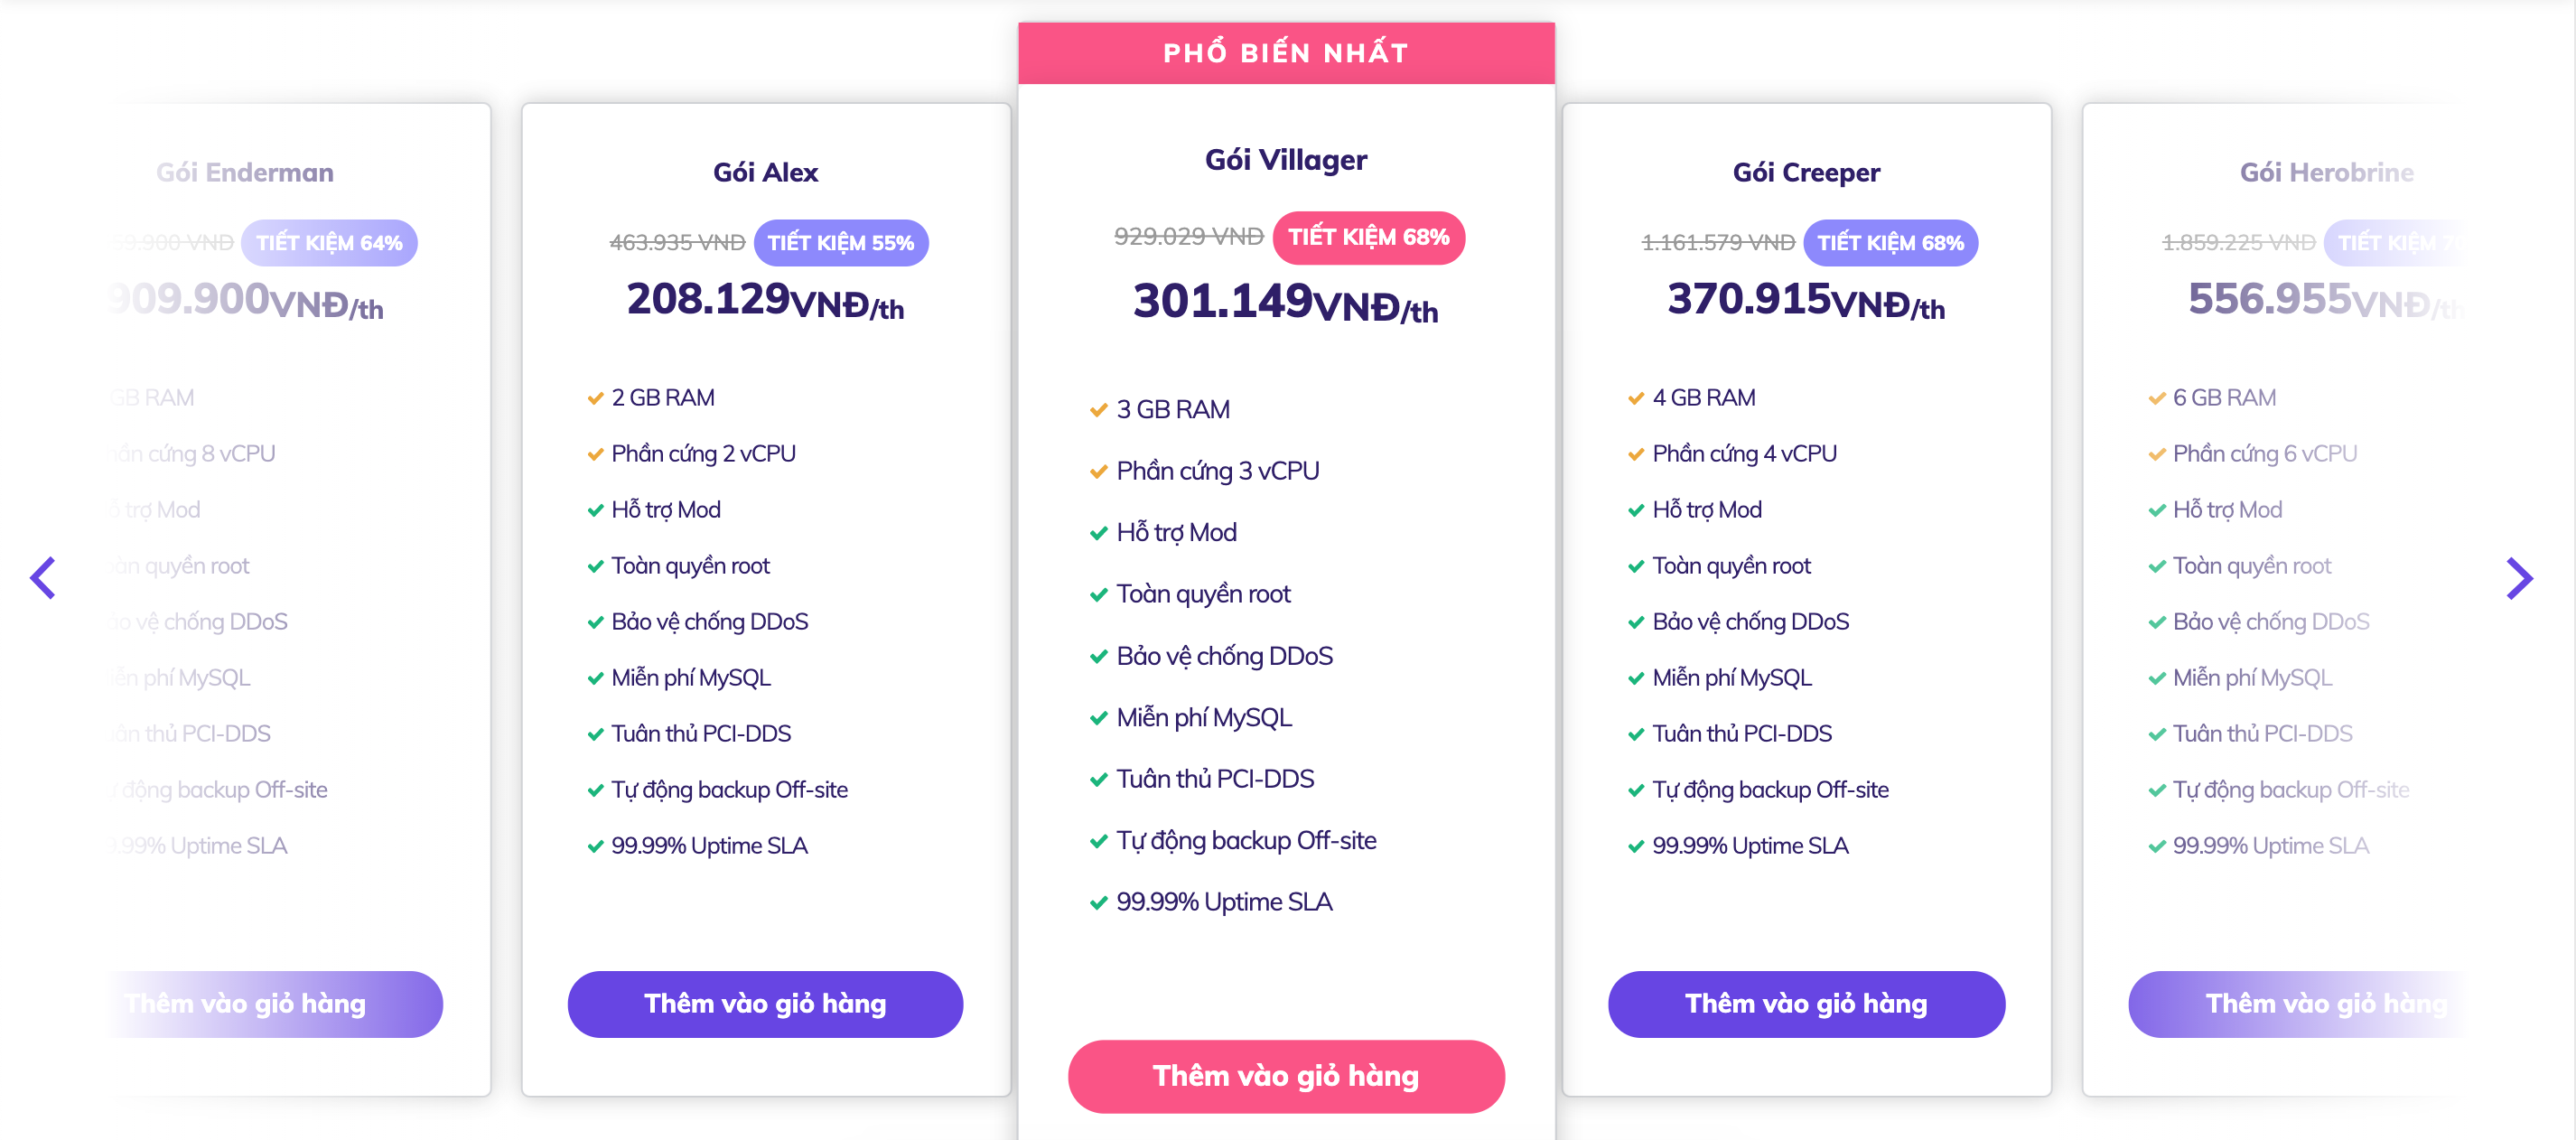
To run a large multiplayer Minecraft game smoothly, you need the resources to do so. We therefore offer five different packages for you to choose from according to your needs.
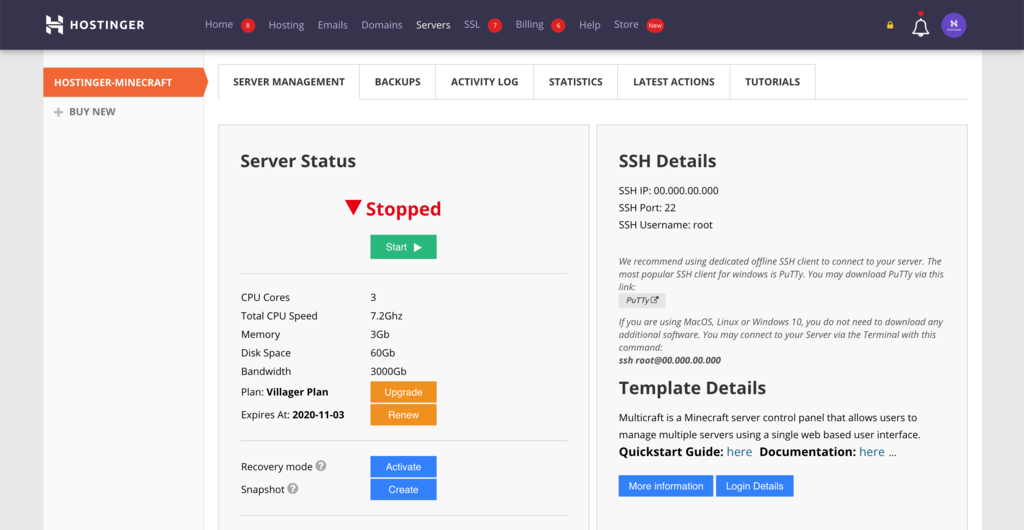
How to choose Minecraft is very simple, calculate as follows: if you want to run a server for up to 100 people without any hiccups, you can use Villager Package ours provides 3 GB of memory. This Minecraft server configuration is more than enough to run the game and provide your friends with an enjoyable experience.
In general, the more RAM you have for your server, the more people can accommodate at the same time. If the server has too many people to handle, you may start to experience lag issues that can affect gameplay. That's when you need to upgrade or limit players.
Furthermore, more RAM allows you to install more plugins on your server, which also affects your server speed.
On top of that, choosing one of our plans also comes with extra features, such as instant server setup, DDoS protection, automatic off-site backups, etc. problem, we have a 24/7 customer support team that will answer all your questions. Please contact them for more advice on choosing a minecraft server.
How to buy Hostinger's Minecraft Server
Buying a Minecraft server at Hostinger is very simple, in just 5 steps:
- Choose a Minecraft pack that best suits your needs, then choose a payment method and continue with your purchase.

- Once the transaction is complete, your server will be set up in seconds
- Log in to hPanel, click the . button Setup for initial configuration for Minecraft Server
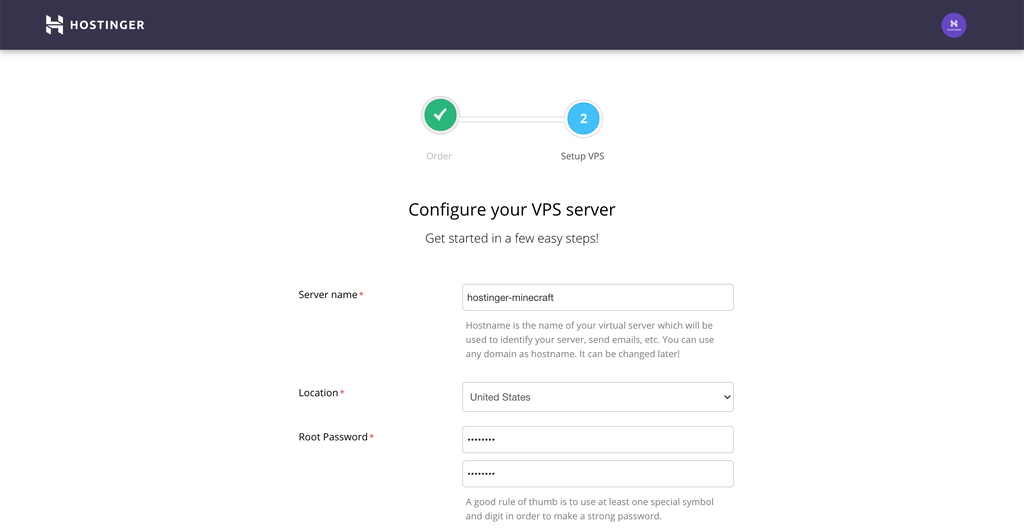
- Enter Server Name (server name), Location (server location), Root Password (password) and press Continue it's done
- You will find the Minecraft server in the Server in hPanel.
- You just need to press the button Start below the box Server Status, Wait a few minutes and the minecraft server will run
Congratulations, you have successfully purchased your own minecraft server and now continue to configure Minecraft Server to play the game.
How to configure Minecraft Server
First, to access Minecraft server control settings, type Control Panel Link which you have found in the Minecraft Server management page under Login Detail. It will look like this:
http://00.000.00.00/multicraft/index.php
From here, enter Username and Password which you will find in the section Note. Using that information to log into your Minecraft server management page, you'll be ready to initially configure Minecraft Server.
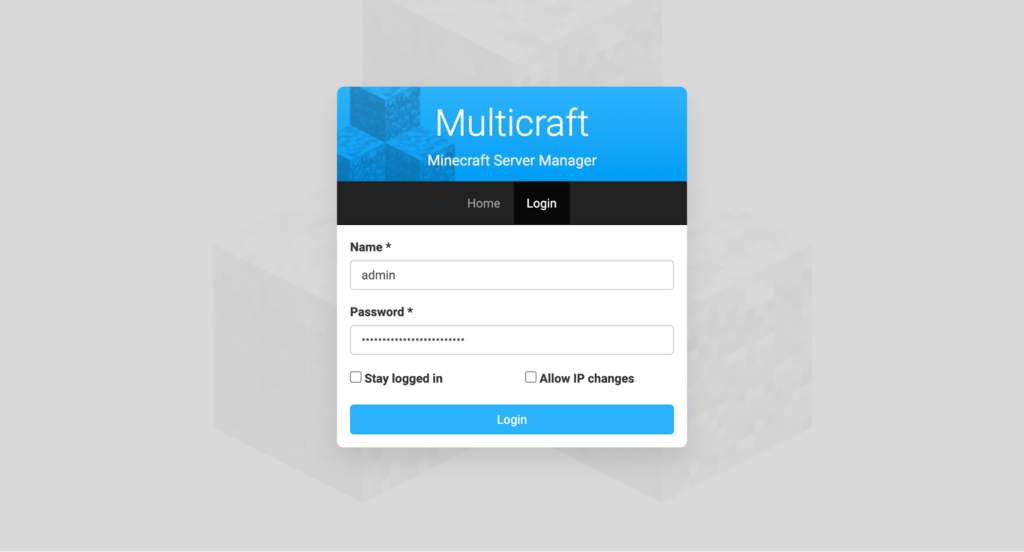
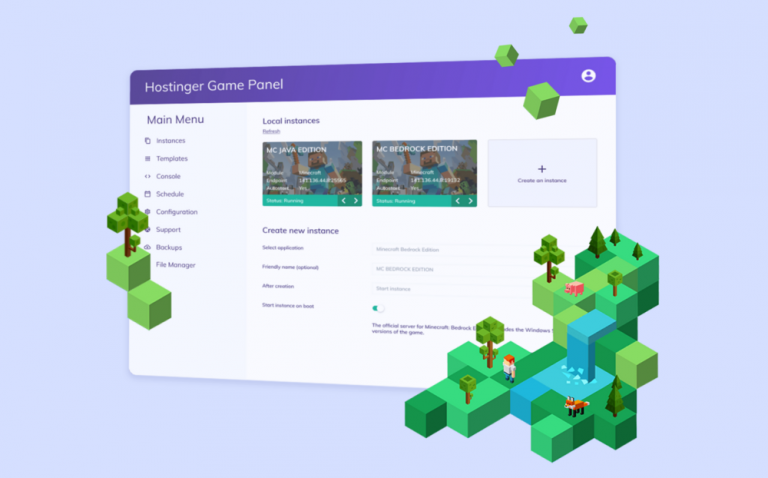
Welcome to Minecraft Manager. Please proceed to configure the Minecraft server according to the following steps:
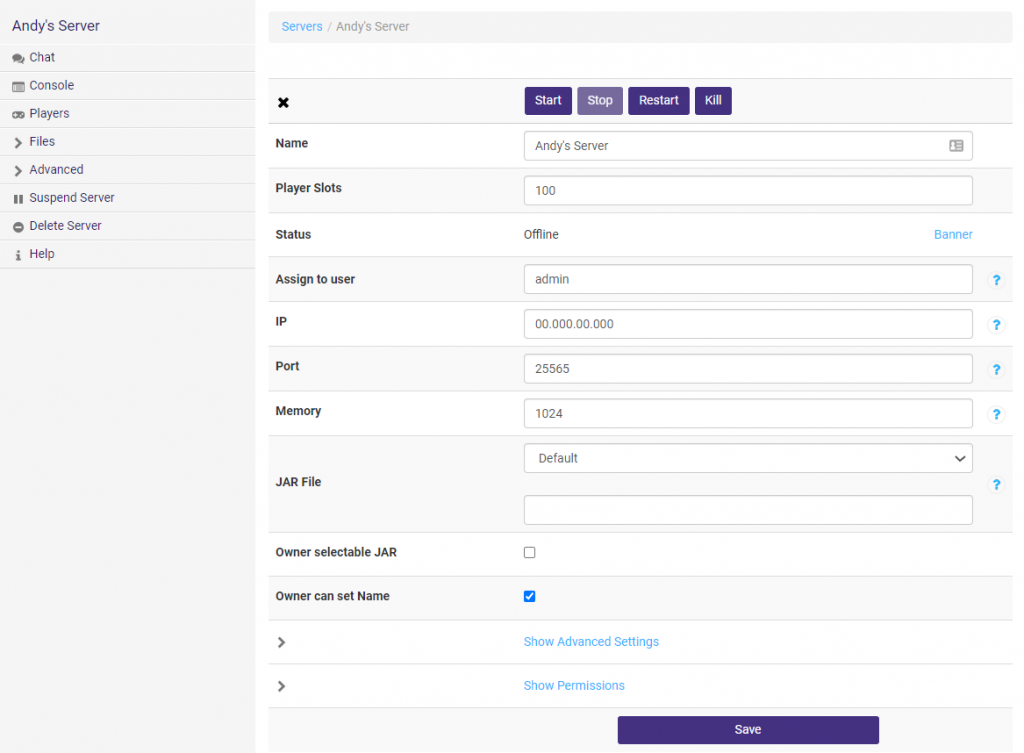
- Create a new Minecraft server:

- Import Name your server and Player Slots according to your choice.
- Option Assign to user allows you to select the user to whom you want to give permission to manage a certain server. If you want to do it yourself, just enter admin.
- Leave default values blank IP, Port, Memory, JAR File — default values will be generated for you.
- Save your settings and once done, press Start and your server should be up and running. Congratulations, your server is now up and running.
Minecraft server configuration information
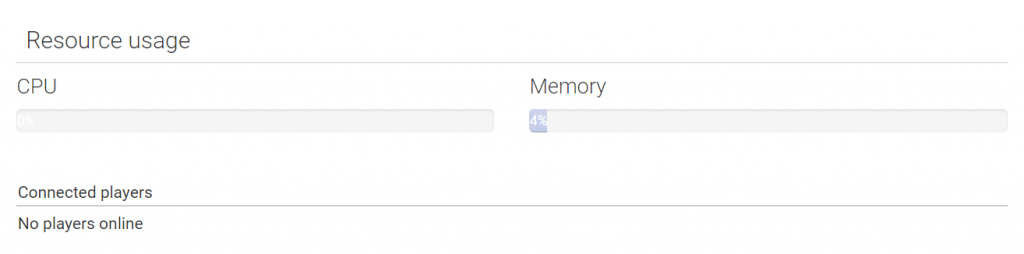
Below all the information on your server you will find Resource usage (resource usage) to see how your server is doing and which players are currently online.
From here, you can customize your server however you want. On the left side of the panel, all the various settings for your Minecraft server are kept.
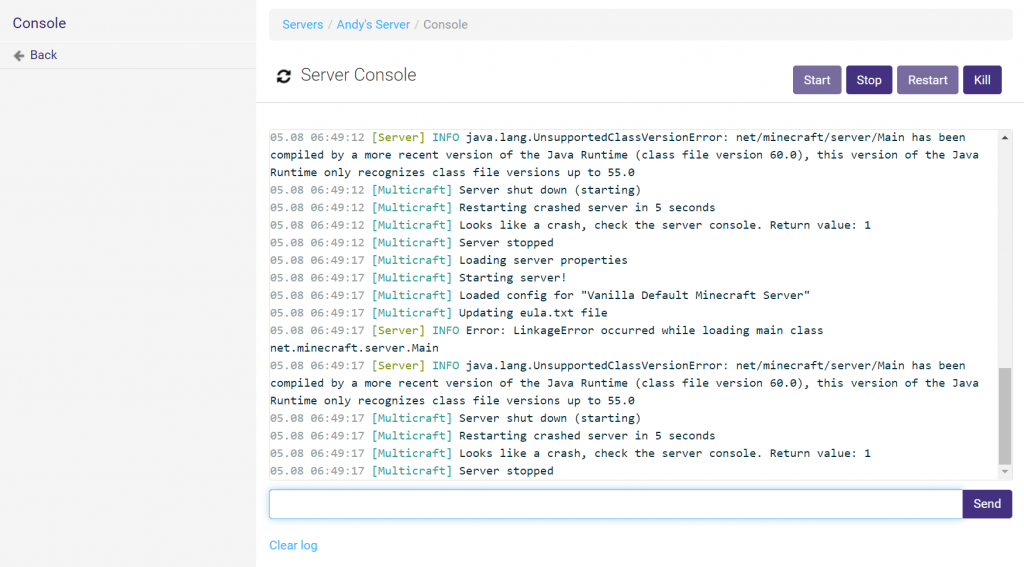
You will find out Console (control panel) here where you can preview everything that's happening on your server. Import help to see all available commands.
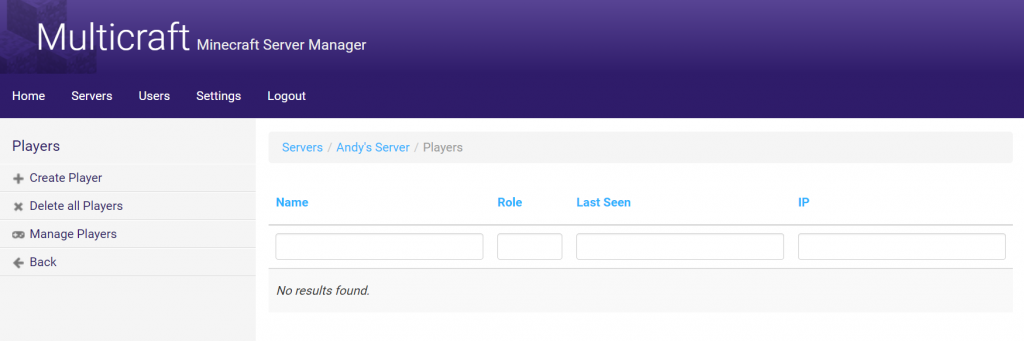
In section Players you can see the history of everyone who has logged into your server. You can set different roles, find the player's IP address, or even ban the player.
For a complete list of all the available settings you can change around, see document page Official Multicraft .
Conclusion
Playing Minecraft can be a wonderful and rewarding experience, no matter your age. Owning a private server for Minecraft helps you enjoy this game to the fullest. Create a place where you and your friends can play whenever they want, or build a strong community of like-minded people.
If you have any questions about minecraft server settings or minecraft server configuration, let us know in the comments. Don't forget to show us how you defeated the ender dragon too.

Huy Do. is an expert in managing and operating Website services. He has many years of experience in Hosting, Domain, Technical, CMS. His hobbies are technology, reading, traveling and mentoring young people to start a business.


")
 Haven't Tried")


Post a Comment
Post a Comment