With increasing threats to cybersecurity and privacy, it becomes crucial to fortify servers with authoritative security mechanisms. VPN allows you to set up a private network that can be used to transfer data from a local computer to a remote server. In this tutorial, we set up the configuration of the VPN Server in Windows Server 2022. REDThis will make your processing much more usable and secure.
In this tutorial, we will leverage Remote and Remote Access Services (RRAS) to configure the VPN server. RRAS provides a seamless and easy to use interface for setting up network features like VPN, NAT, Dial-Up Access server, Lan Routing,…
Here are the prerequisites for setting up a VPN Server on Windows Server 2022:
- Dedicated server with Windows Server 2022 or Cloud installed VPS
- You must log on to the system as an administrative user through the Remote Desktop Protocol.
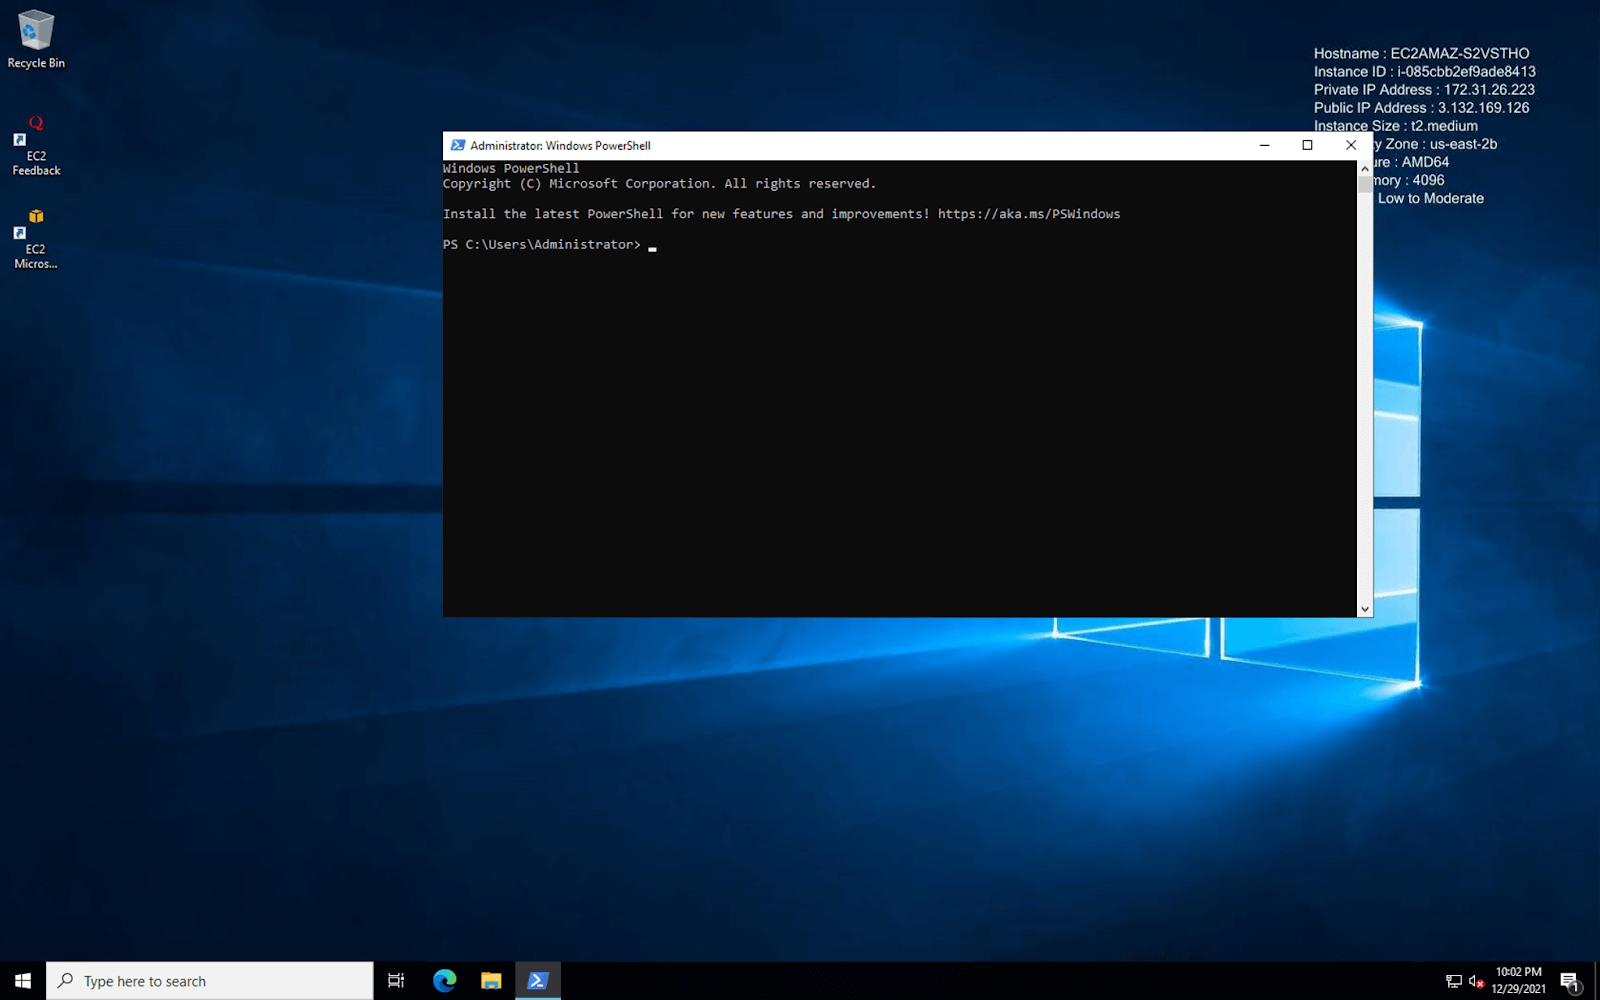
Step 1: Update your Windows system
Go to the start menu and search for Windows Powershell. Right-click the Windows Powershell result and click Open as Administrator.
Now we will install the update module Windows for Powershell to update the system. System update ensures that you avoid any problems or security holes while setting up VPN server on Windows 2022 server. Enter the following command to install Windows update module for Powershell:
Install-Module PSWindowsUpdate
Powershell may prompt you for confirmation. Press Y and Enter To confirm.
Now enter the following command to get the list of latest updates:
Get-WindowsUpdate
Finally, install all the latest updates by running the following command:
Install-WindowsUpdate
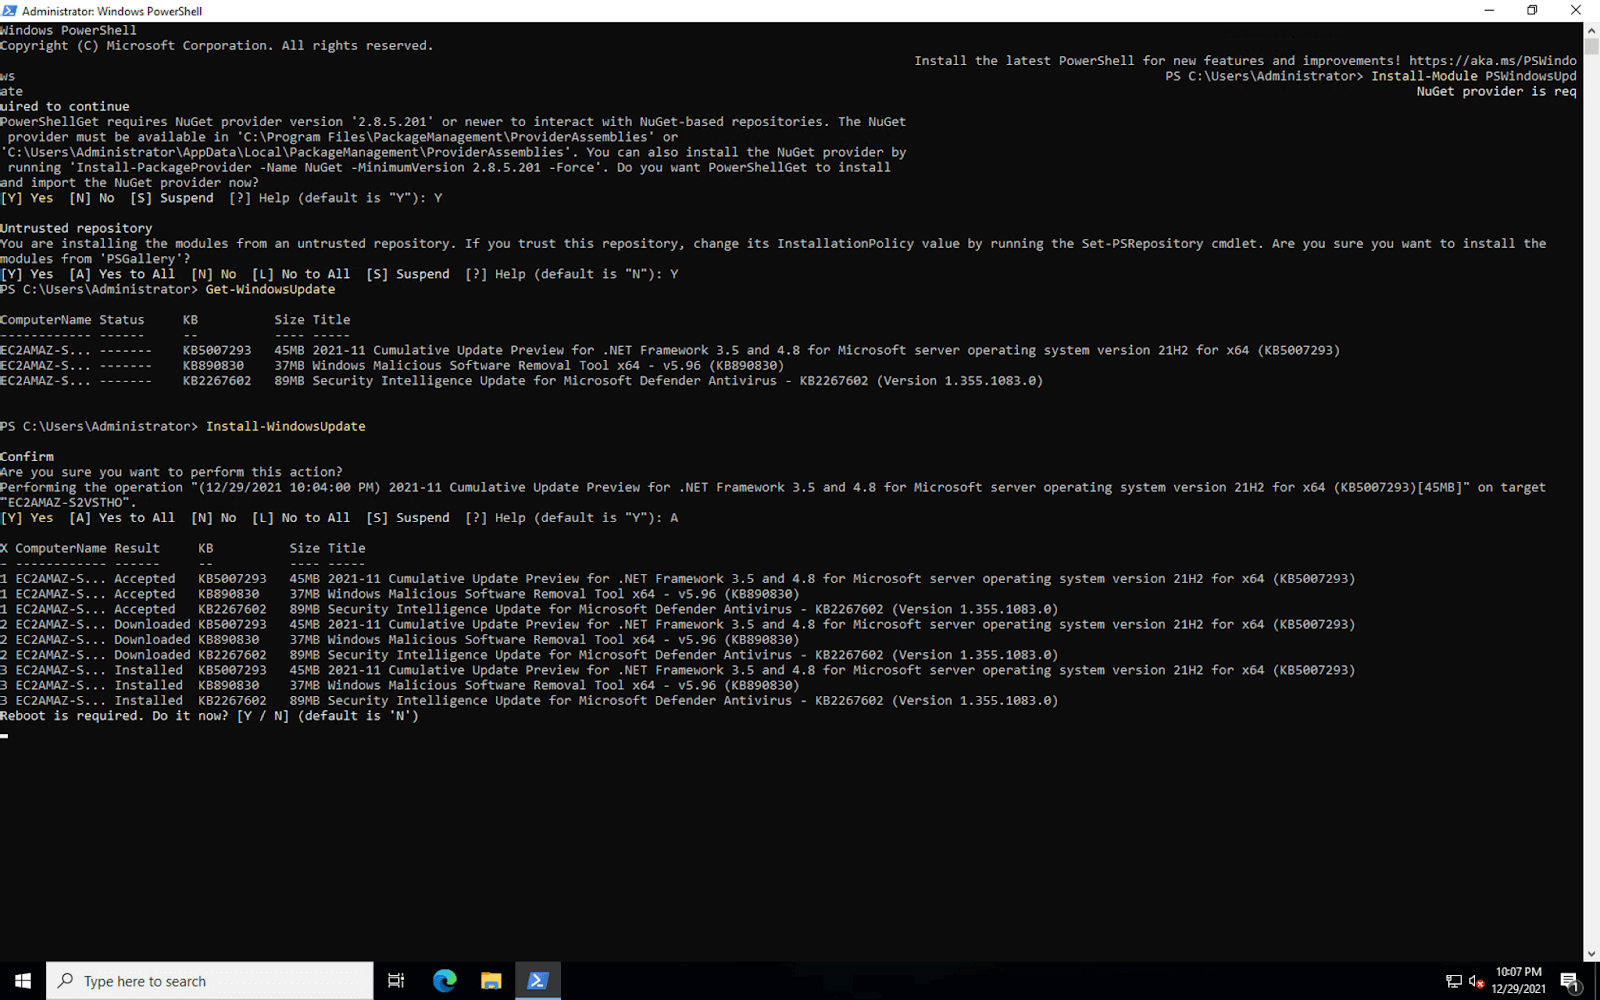
Now Windows Server 2022 your file has been updated, you will be asked to reboot the system, Press Y or Restart the system by entering the following command:
Restart-Computer
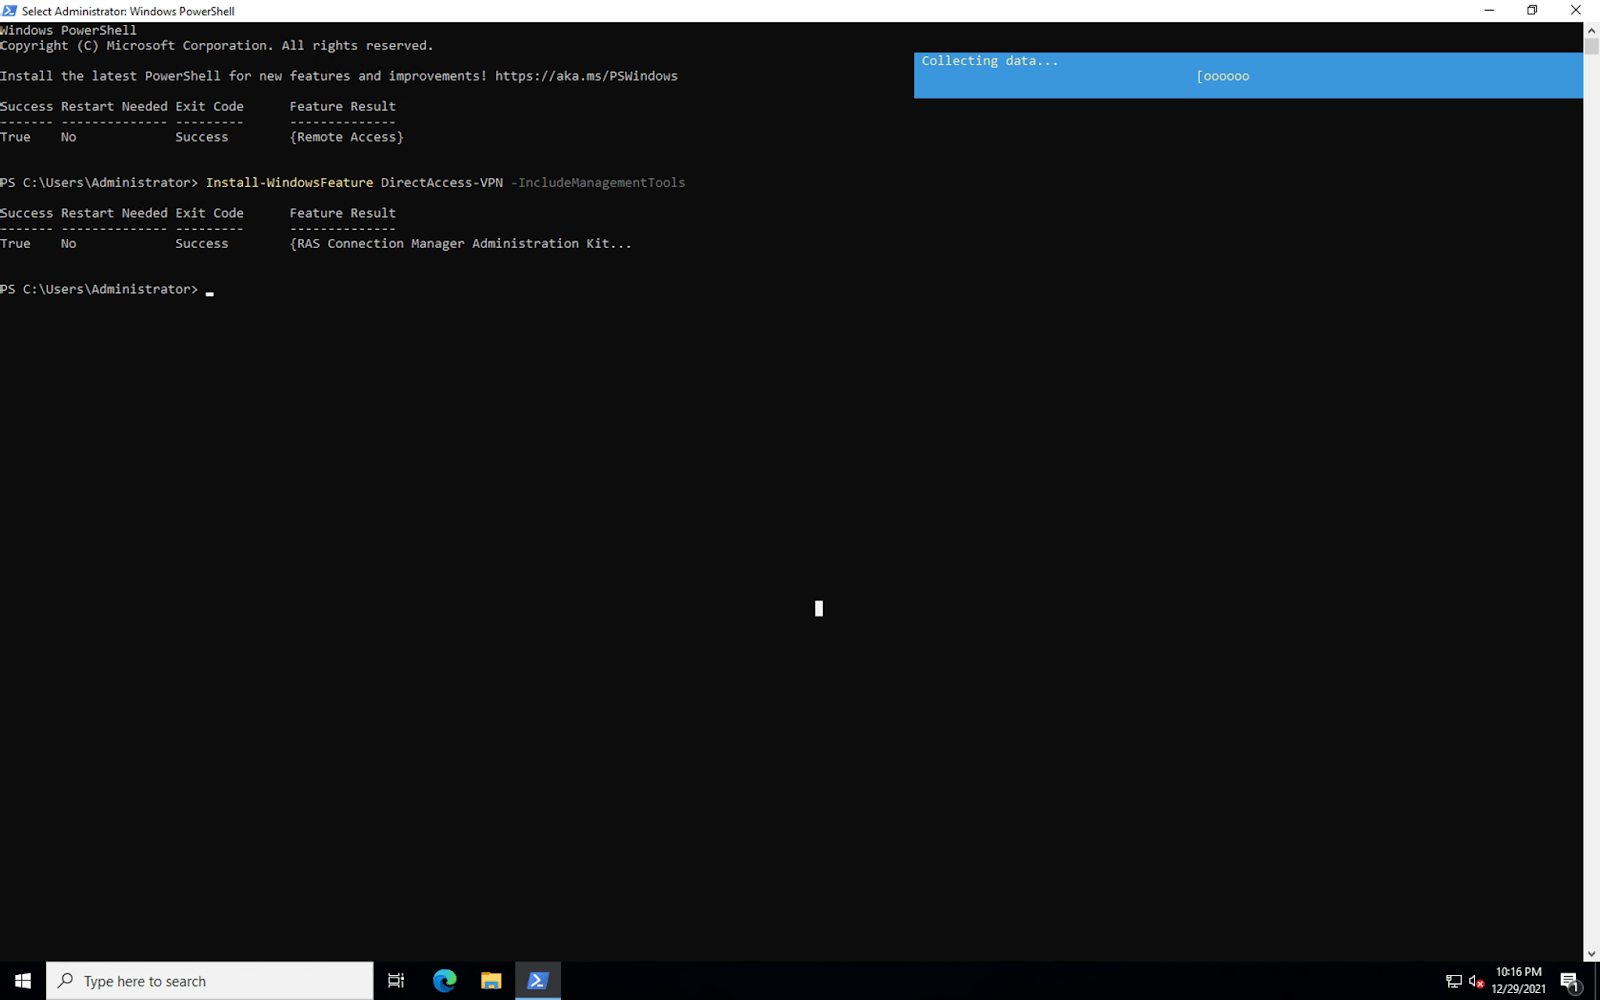
Step 2: Install the Remote Access Role in your Windows Server 2022
Launch window Windows New Powershell in admin mode and enter the following commands to install the following steps:
- Remote Access feature.
- Direct Access and VPN ( RAS ).
- Routing with management tools.
Install-WindowsFeature RemoteAccess
Install-WindowsFeature DirectAccess-VPN -IncludeManagementTools
Install-WindowsFeature Routing -IncludeManagementTools
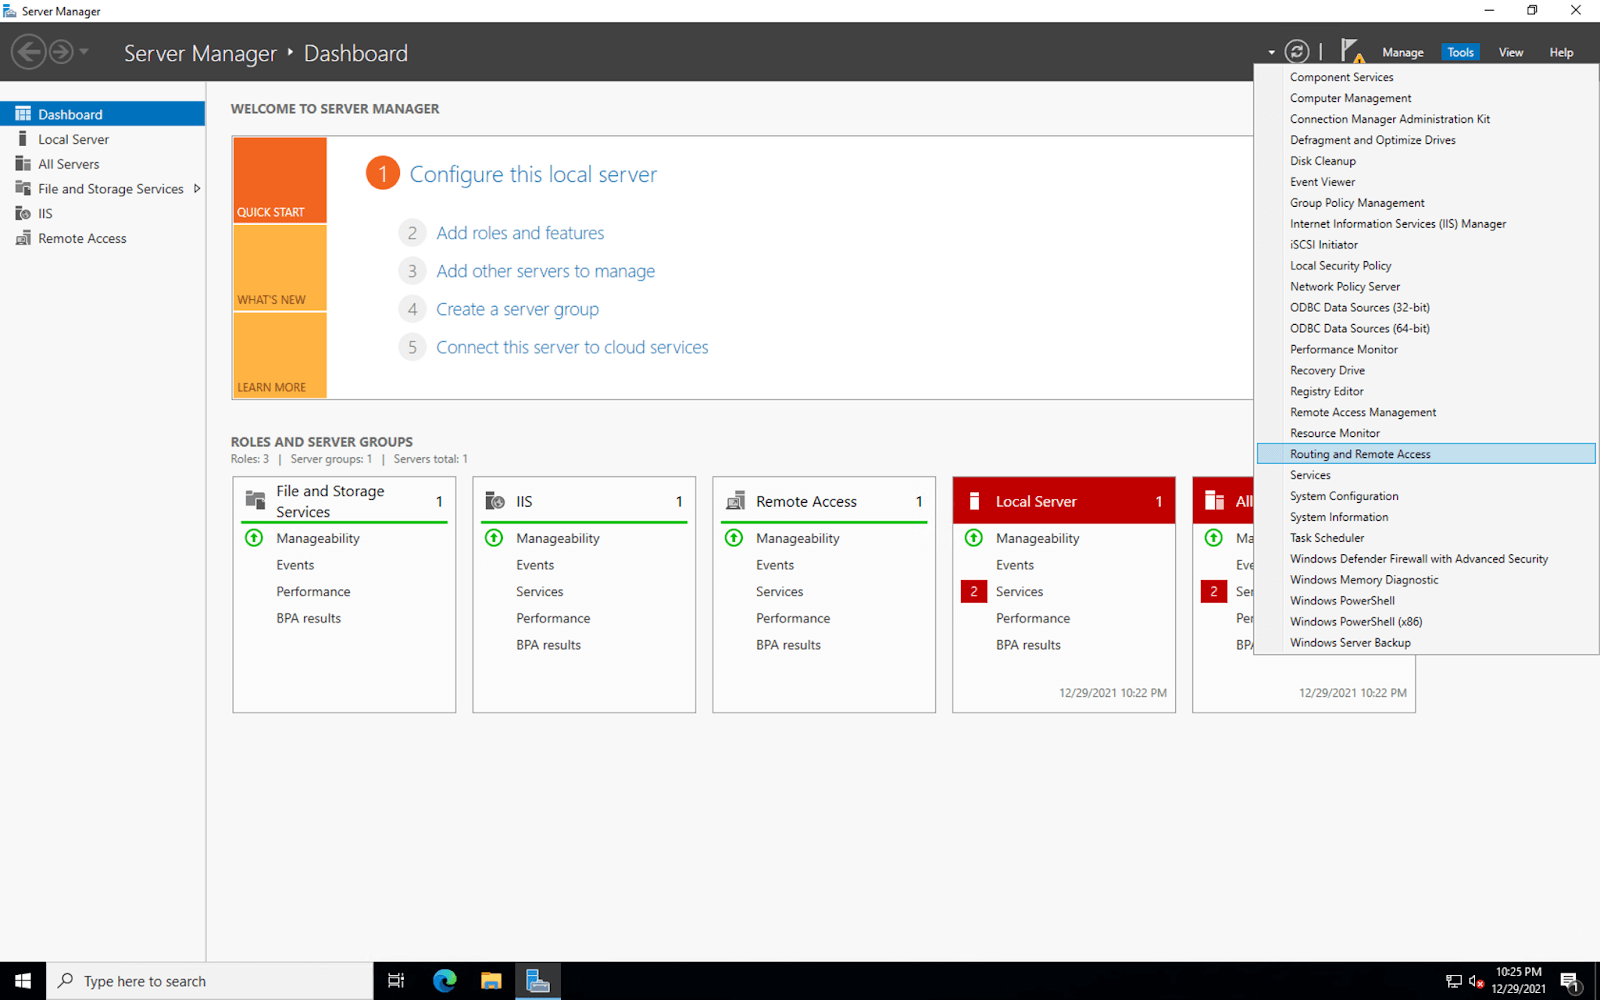
Step 3: Set up routing and remote access
Open Windows Server Manager through the Start Windows.
Go Routing and Remote access in the item Tools.
Right click on Local server and click on the option “Configure and Enable Routing and Remote Access”. Trouting and Remote Access Server Setup Wizard will open.
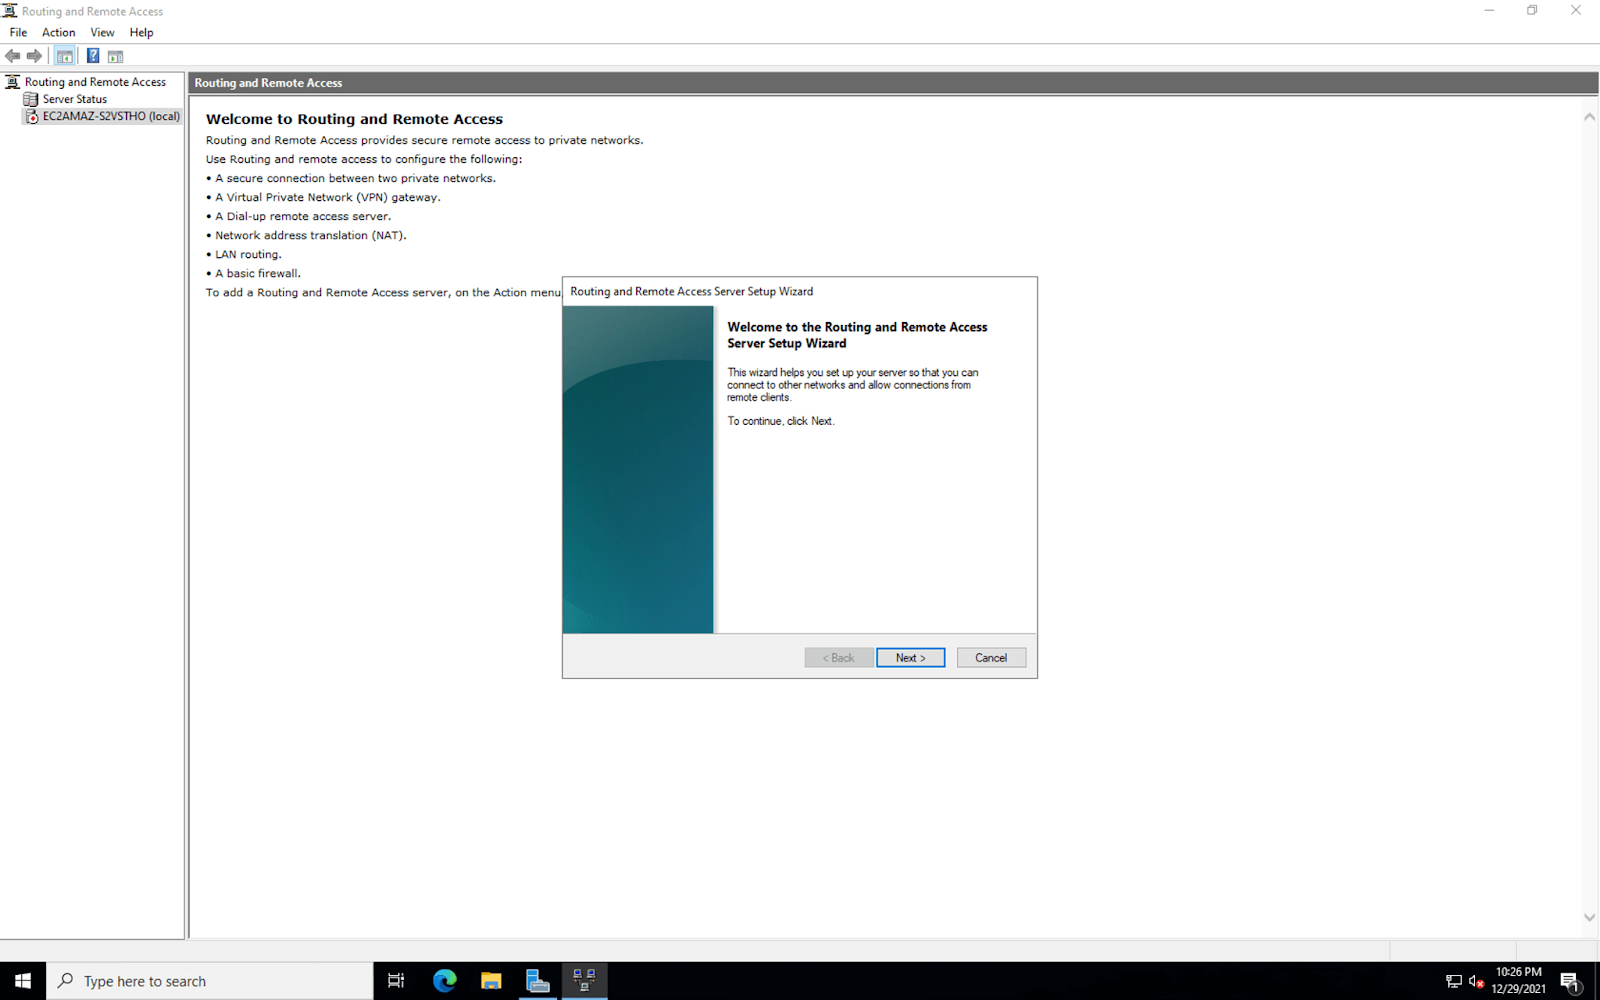
In Routing and Remote Access Server Setup Wizard, Please choose "Custom Configuration”. Then press “Next“.
Now, check the box “VPN Access" and " NAT” when the wizard asks for the services you want to enable on the server. Click the button “Next Button” to see a summary of your selection.
Finally, after you click the . button Finish, you will see a prompt showing “The Routing and Remote Access service is ready to use“Run the service by clicking the button Start Service.

Step 4: Set VPN properties
Your VPN Server will be running on your system after Step 3. Now it's time to configure it. Right click on Local Server yours, choose Routing and Remote Access window, and navigate to “Properties”.
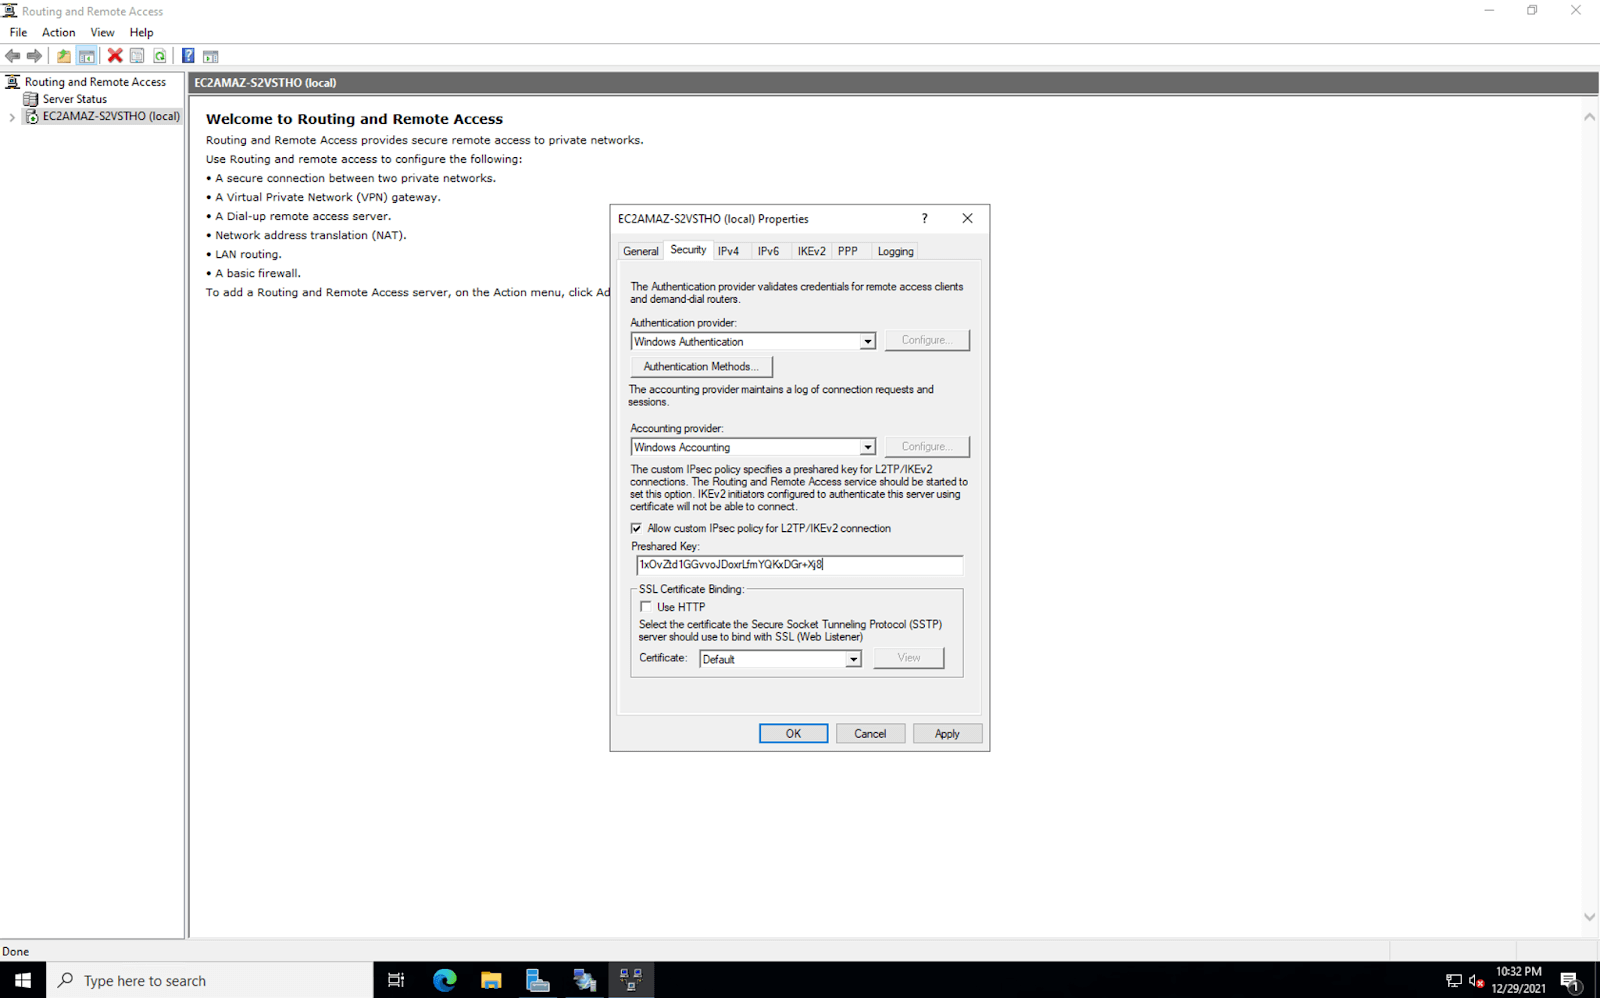
Move in Security and select "Allow custom IPSec policy for L2TP/IKEv2 connection”. Enter one PSK (Pre-shared key) below it. You can generate a random key using any tool. You can also use Google cloud random key generator .
Then navigate to the IPv4 tab and select the static address group under IPv4 address assignment. Then press the “Add” and you will get a pop-up to enter IP address ranges. In the pop-up window, enter the start and end addresses of the range of IP addresses that you want the user to specify.

Click the button OK to save the IP address ranges and finally click the . button OK on the Properties window. You may see a message that you need to restart the service Routing and Remote Access to apply the changes successfully. You can ignore it and click OK as we will still restart the service after the next step.
Step 5: Configure NAT . properties
Your server is listed on the left pane of the window Routing and Remote Access. Expand it by clicking the sideways arrow or double-clicking. Similarly, extend the IPv4 listed in your server. You will find out NAT over there. Right click on NAT and select the option “New Interface”.
Choose " Ethernet " and press OK to continue. On the NAT tab, go to the radio button “Public interface connected to Internet” and choose “Enable NAT on this interface”.

Furthermore, navigate to the tab “Services and Ports" and check the box "VPN Gateway(L2TP/IPSec – running on this server)". You'll see a new interface for editing the service's settings.
Now change the private address from 0.0.0.0 Fort 127.0.0.1 and save by pressing OK.
Finally, save the configuration of the NAT interface by clicking OK.
Step 6: Restart Routing and Remote Access
Right click on Local Server your. Choose Routing and Remote Access. Click "Restart" in "All Tasks”.
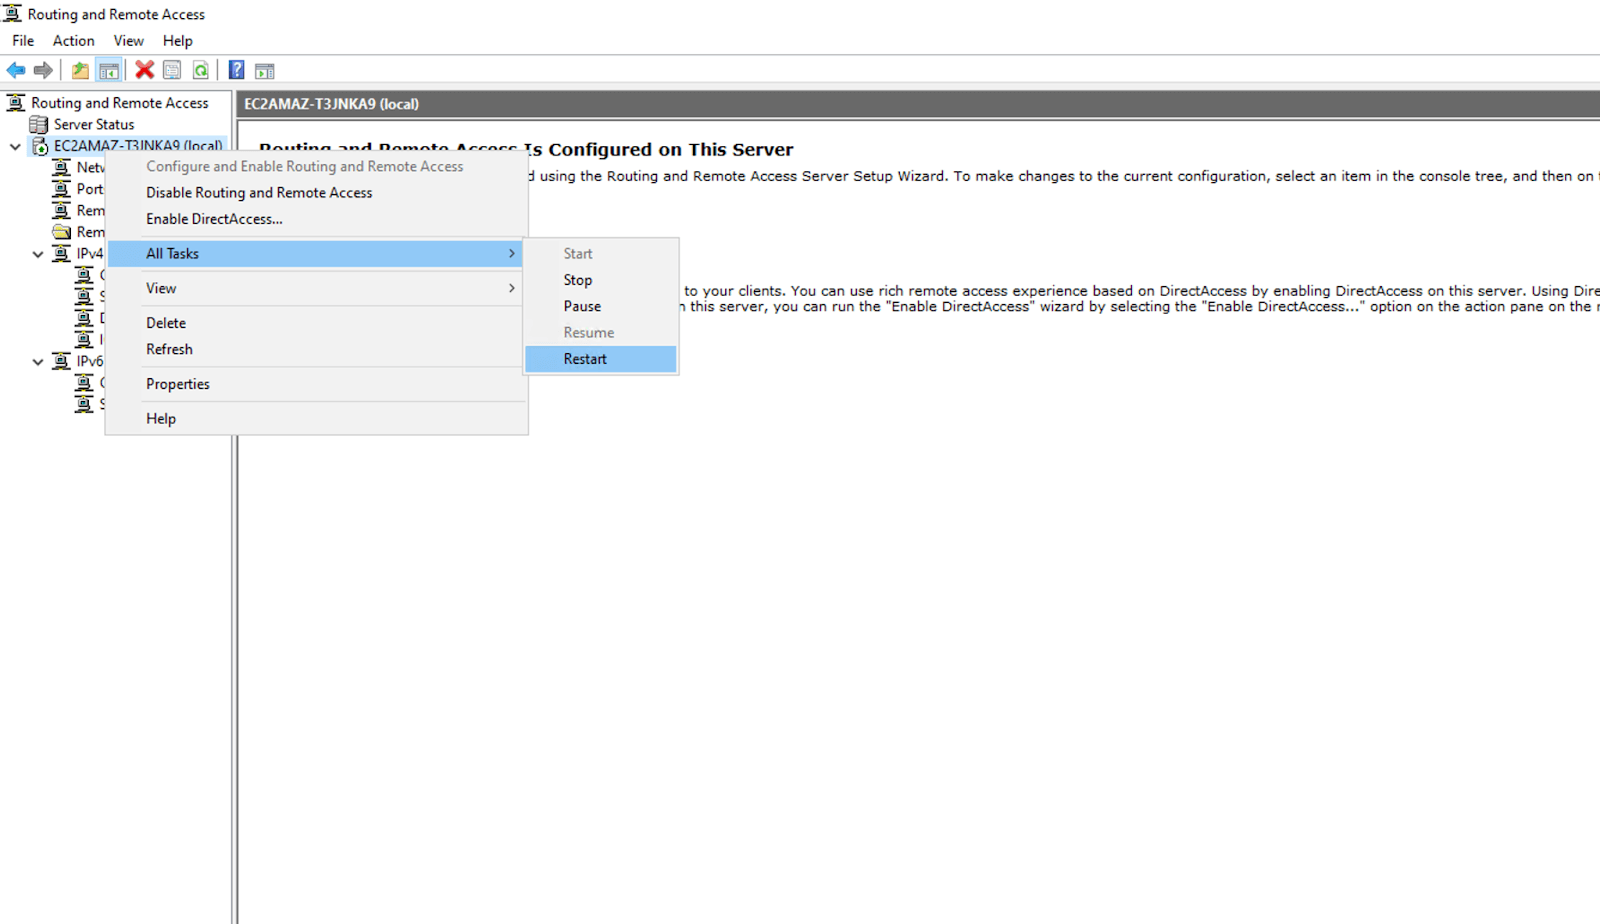
This will restart all services and tasks in the Routing and Remote Access service. This will also ensure that our changes and configurations have been applied.
Step 7: Install Windows Firewall
Open Windows Defender Firewall via Start Menu and move the mouse to “ Inbound Rules”.

Above "Inbound Rules" in the left pane and select "New Rule" in the right pane. The New Inbound Rule Wizard will open.
Windows Server 2022 already has predefined rules for running a VPN server. We just need to enable them. In New Inbound Rule Wizard, Please choose "Predefined" and select the option "Routing and Remote Access” from the drop-down menu.
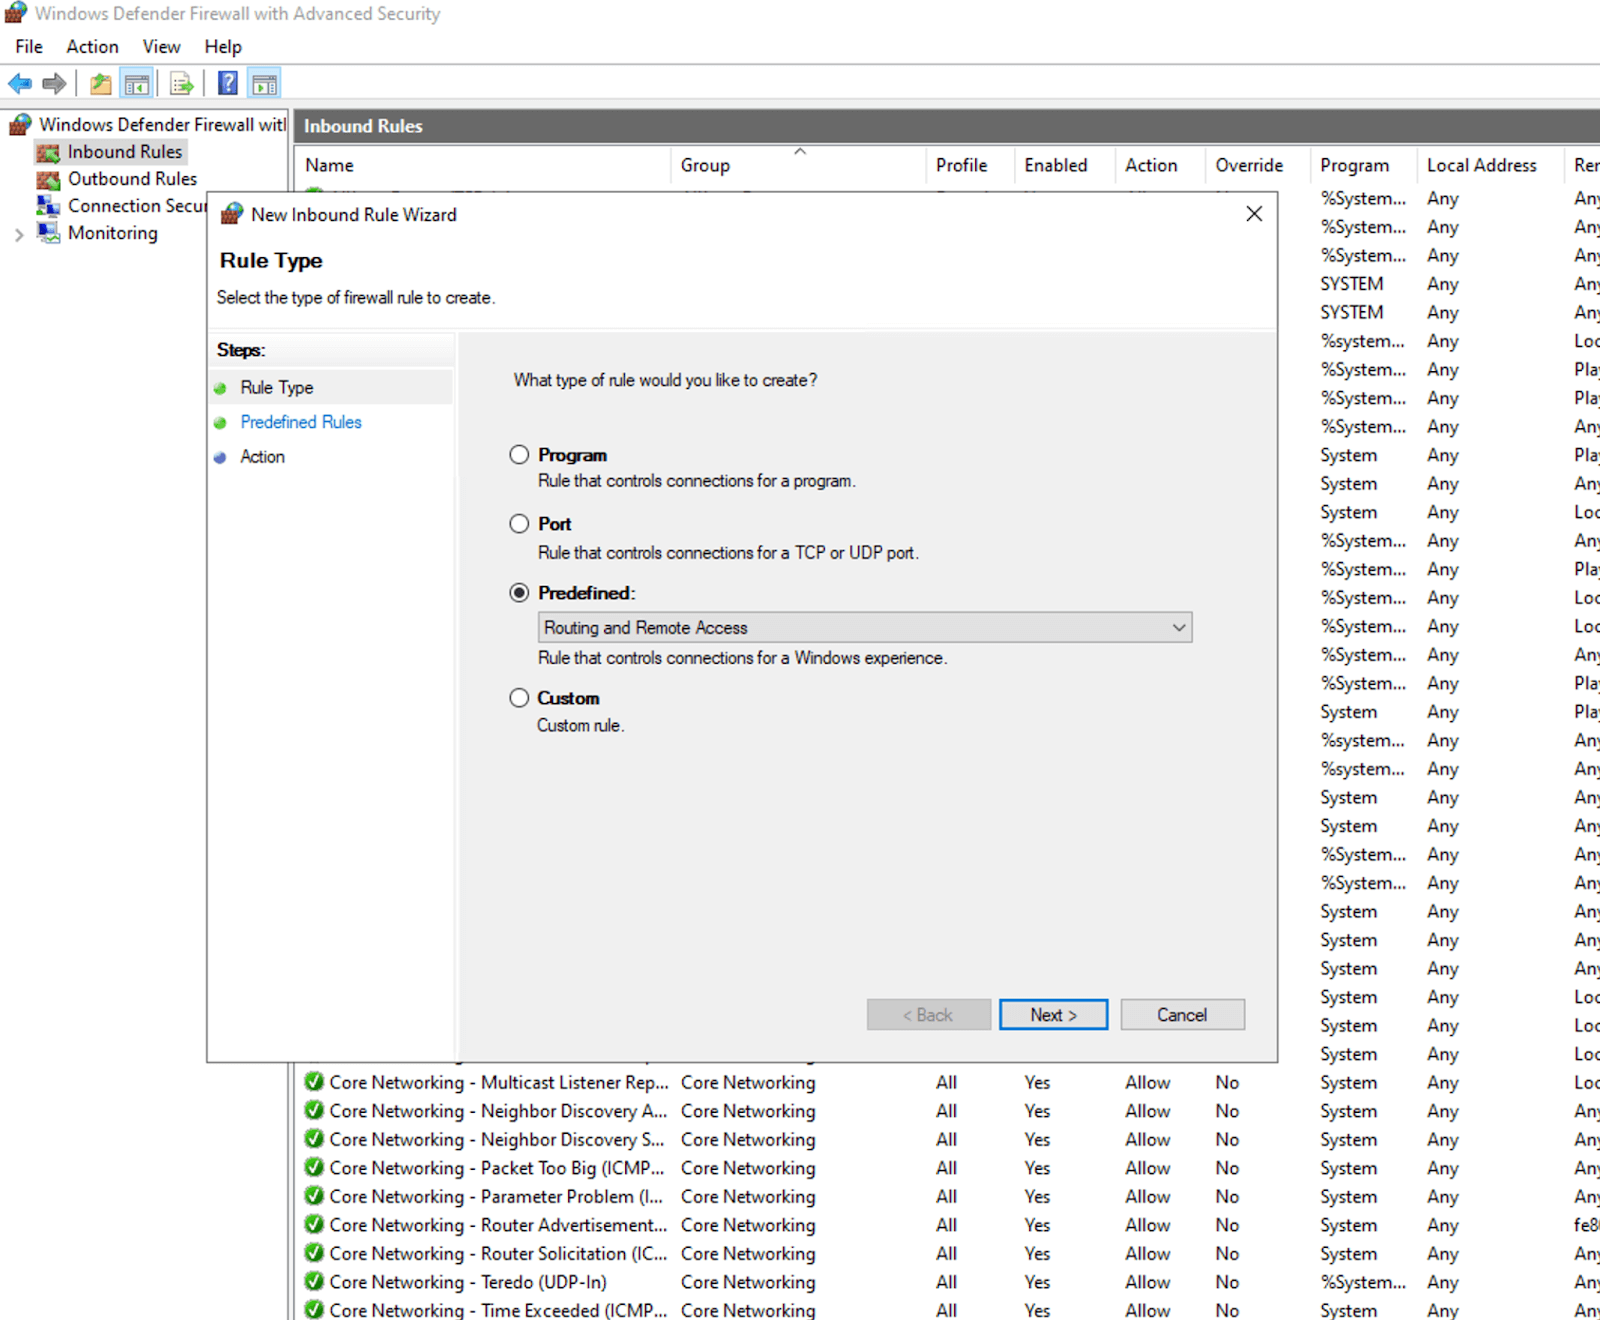
In section "Predefined Rules", choose "Routing and Remote Access(L2TP-In)" and press Next.
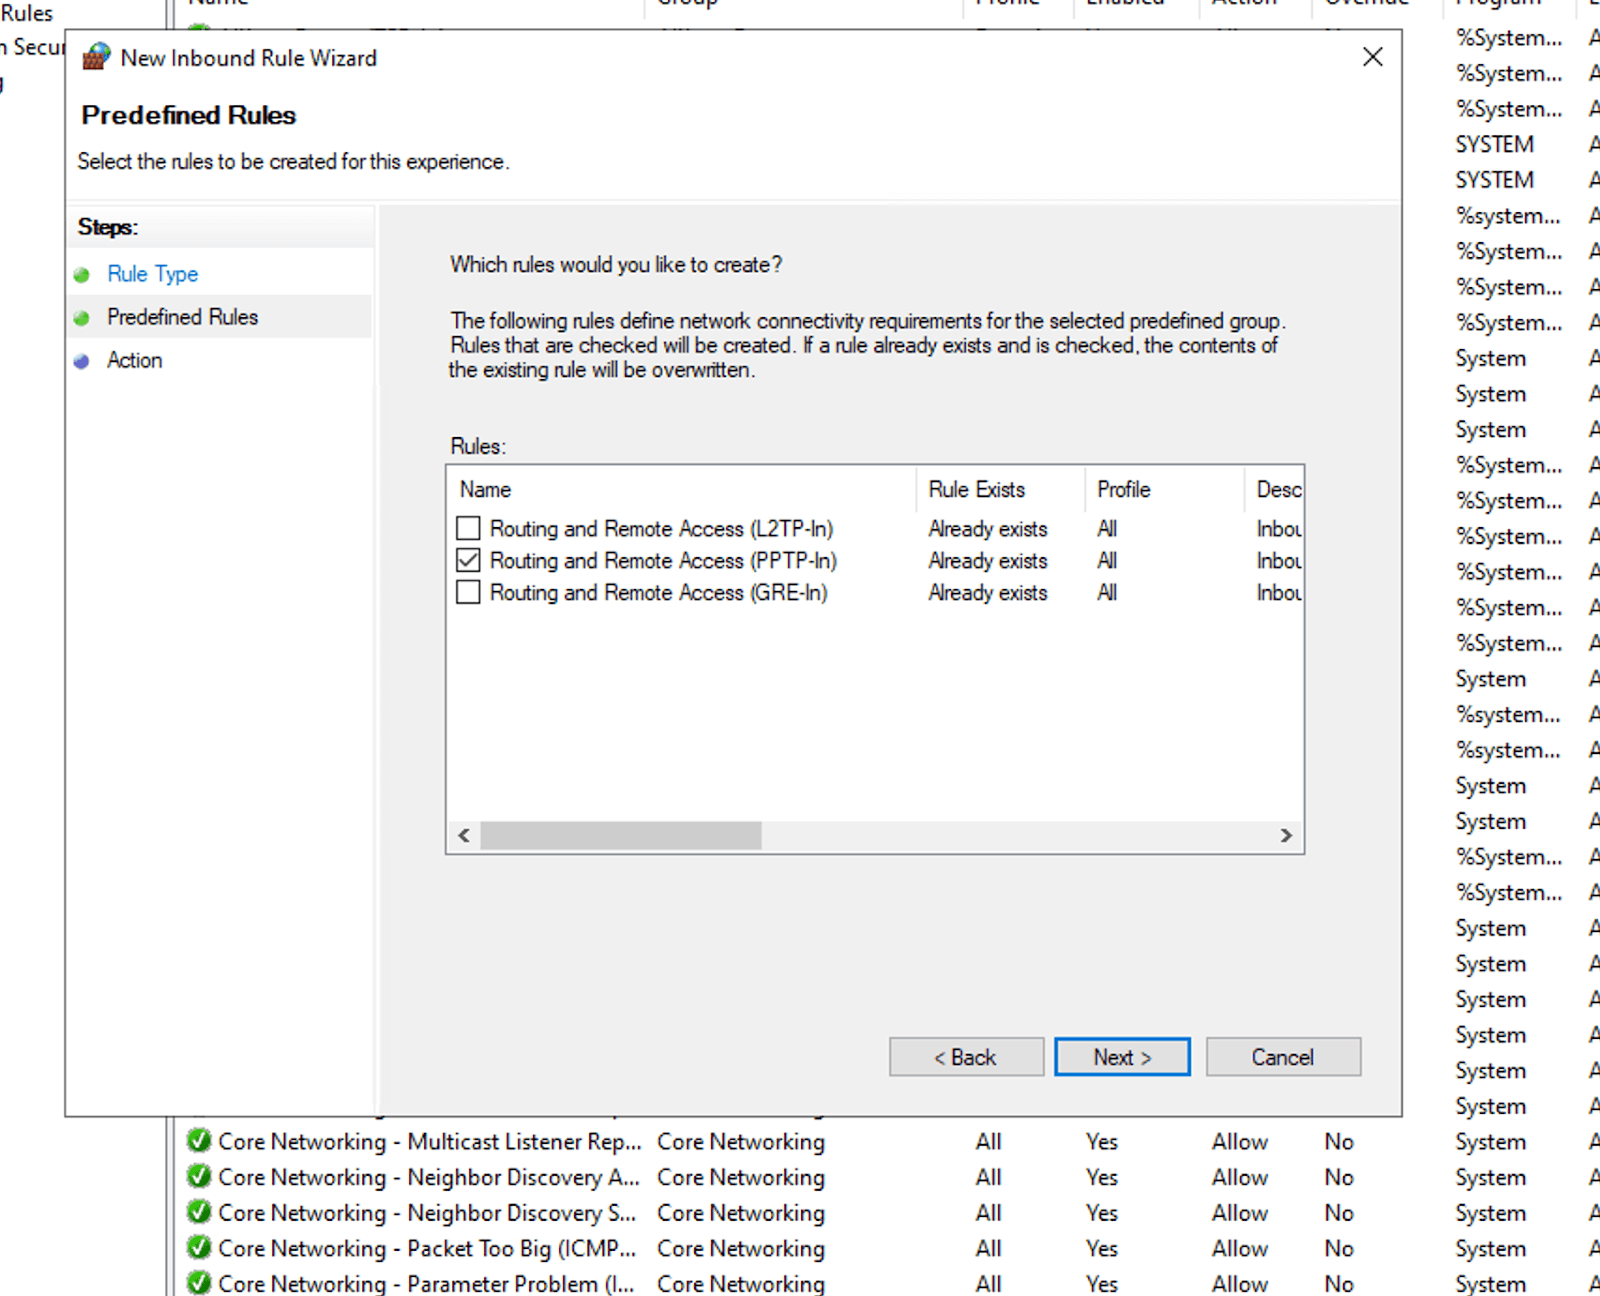
In section "Action, select the option “Allow the connection” and click Finish.
We have set up Windows Firewall to allow incoming traffic on the port UDP 1701.
Step 8: Create a VPN User
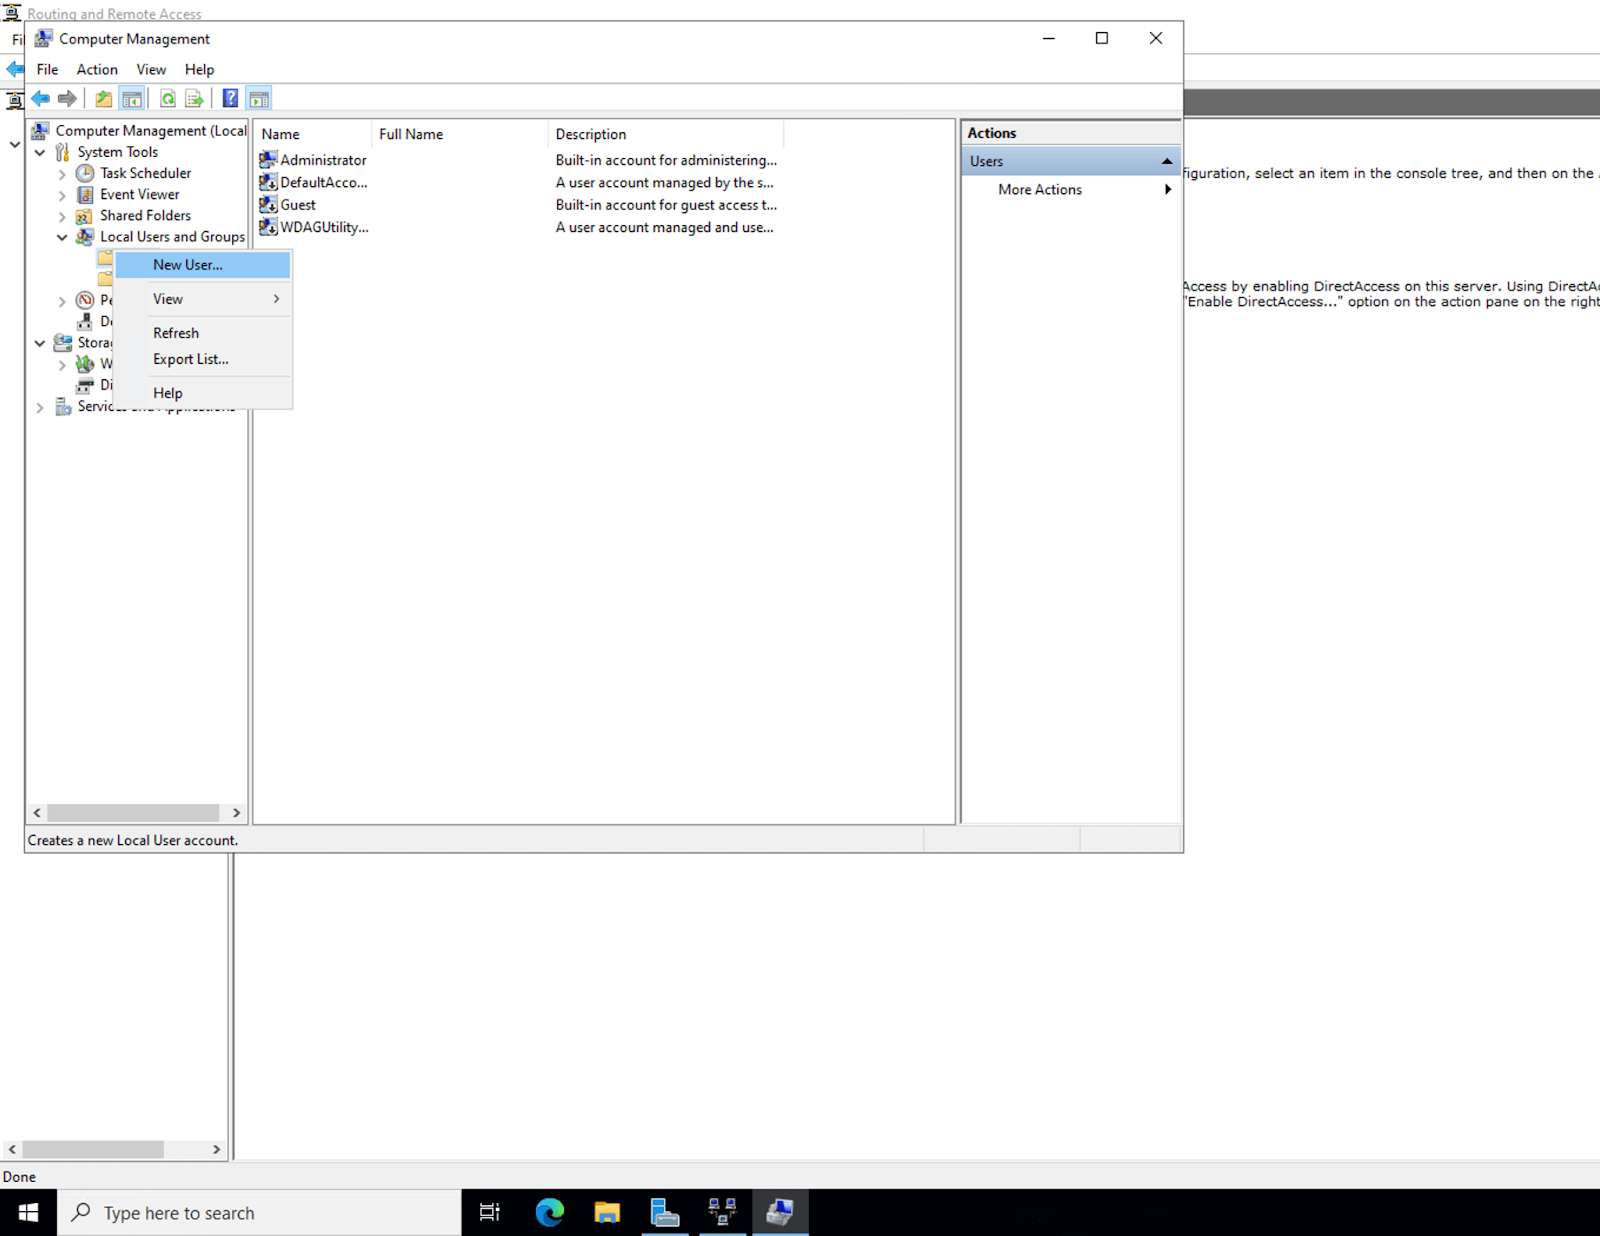
Open "Computer Management"from WORLDtart Menu. You will see"Local Users and Groups” in the left pane of the window Computer Management. Expand it and right click on “Users". Click "New Users” to create a new user.
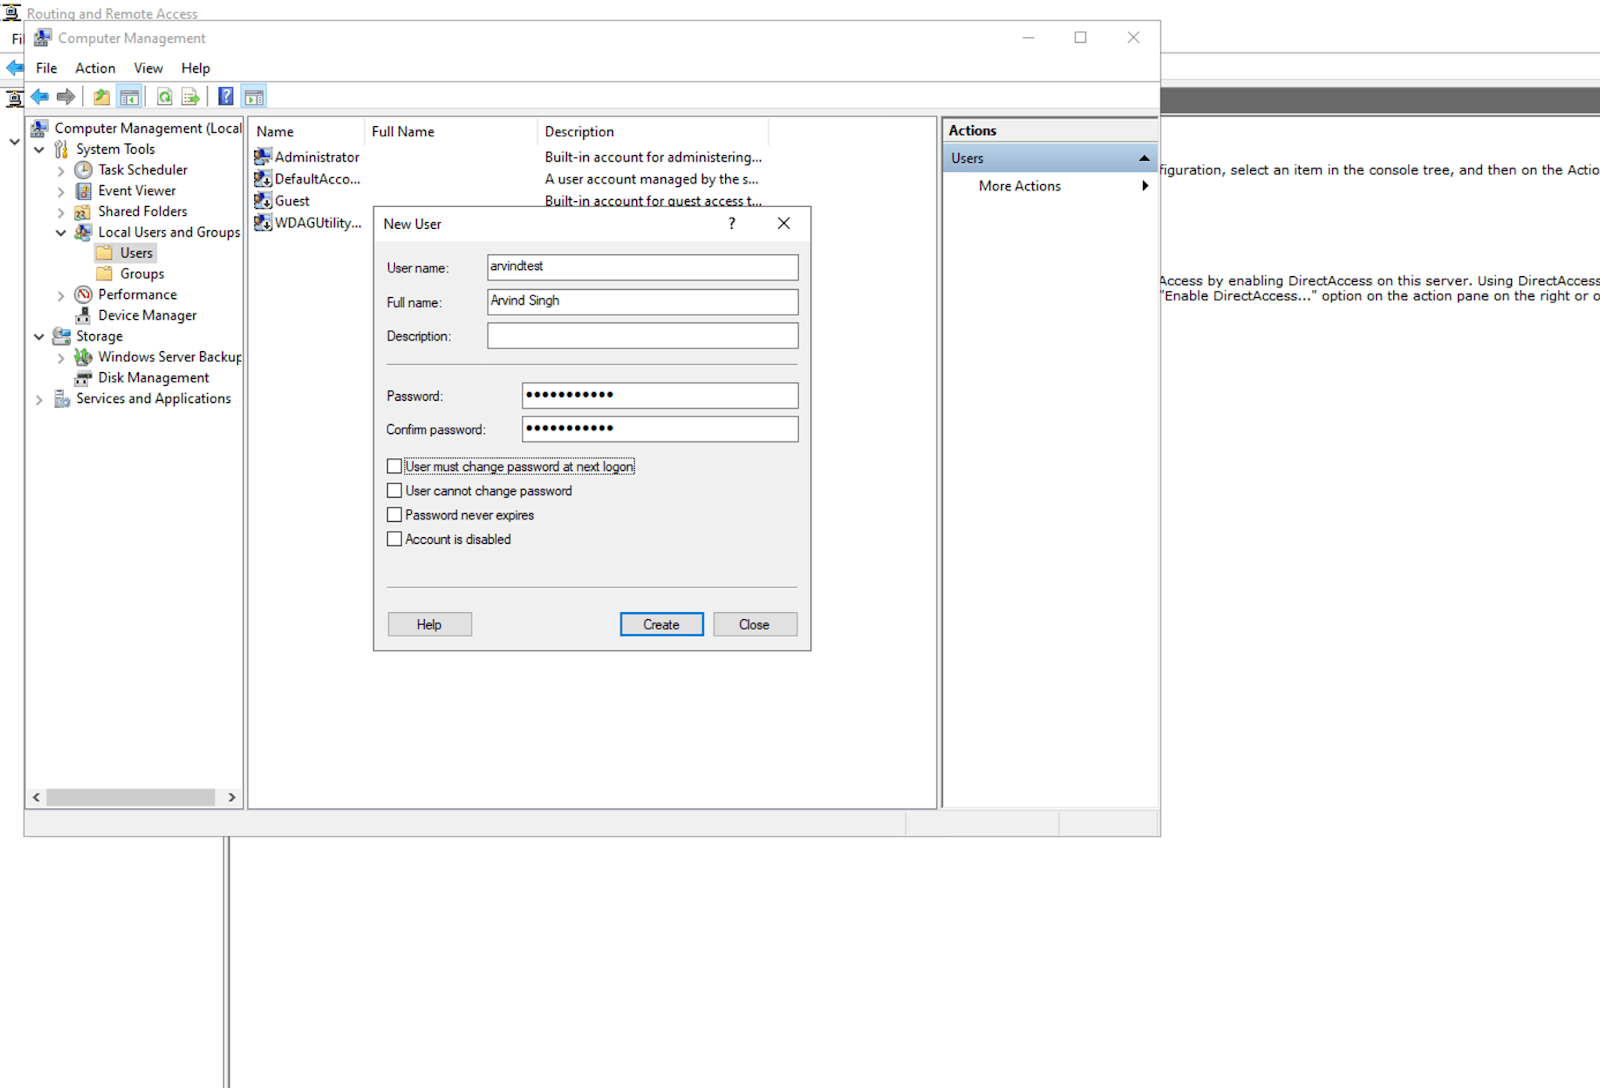
Reminder A New User will open. Enter username, full name and strong password in it. Uncheck the checkbox “User must change the password on next login". Press Create.
You will find the newly created user listed in the window Computer Management. Right click on User and click option Properties.
Go to tab Dial-in in VPN user’s properties. Select radio button Network Access Permissions setting. Press OK to save properties.
You have successfully set up a L2TP/IPSec VPN server on Windows Server 2022 and it is now ready to accept connections.
Step 9: VPN Client Connection
Once your VPN server is successfully set up, you can now easily connect to the remote VPN server with other devices. All you need to do is share the PSK and Windows credentials with the users who want to connect to the VPN Server.
Step 10: Monitor Your VPN Server
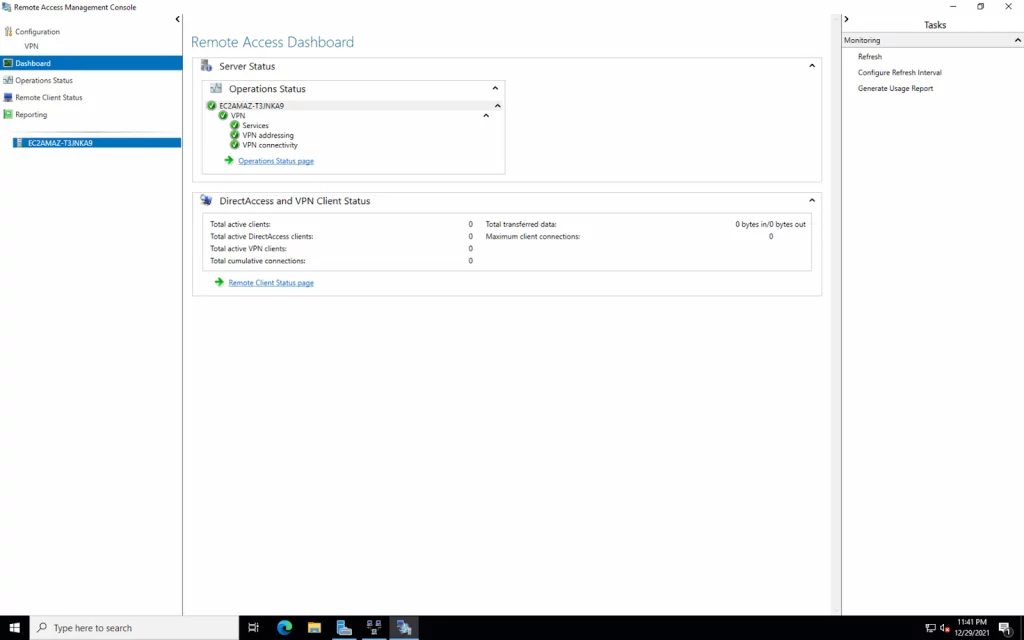
Open Remote Access Management Console by looking for it in Start Menu. In the dashboard, you will be able to see the status of your VPN server in the dashboard. If you have successfully installed VPN Server on your Windows Server 2022 by following the instructions, you will see a green checkmark on all services. Remote Access Management Console can also be used to view the details of connected clients.
BKNS has guided to set up VPN Server on Windows Server 2022 in 10 easy and simple steps. Good luck!


")
 Haven't Tried")


Post a Comment
Post a Comment