I. What is Staging?
The Staging environment is a copy of your website where you can preview any changes or improvements before you apply them to your site. This feature can prevent your website from dying and getting unexpected errors on your running site.
II. How to create a staging
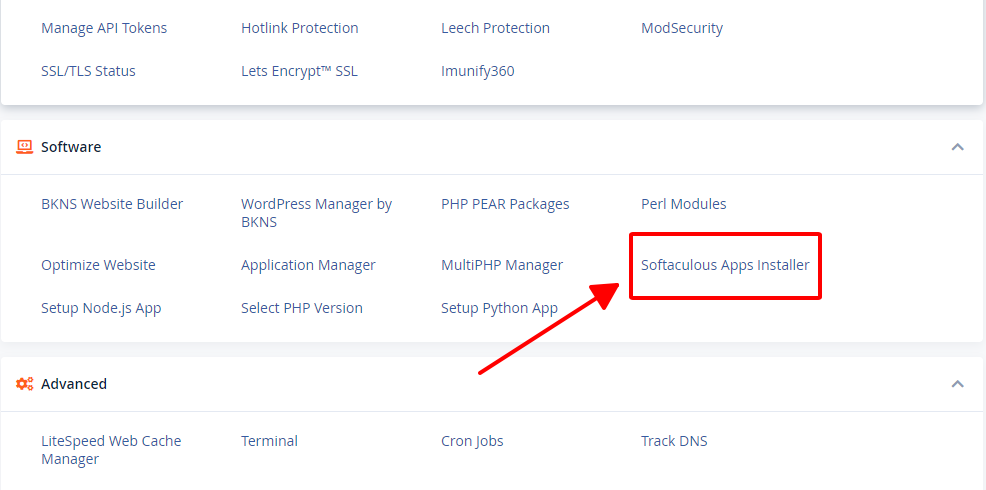
Step 1: You login to the hosting containing your website, in this article is Cpanel then you choose Softaculous Apps Installer
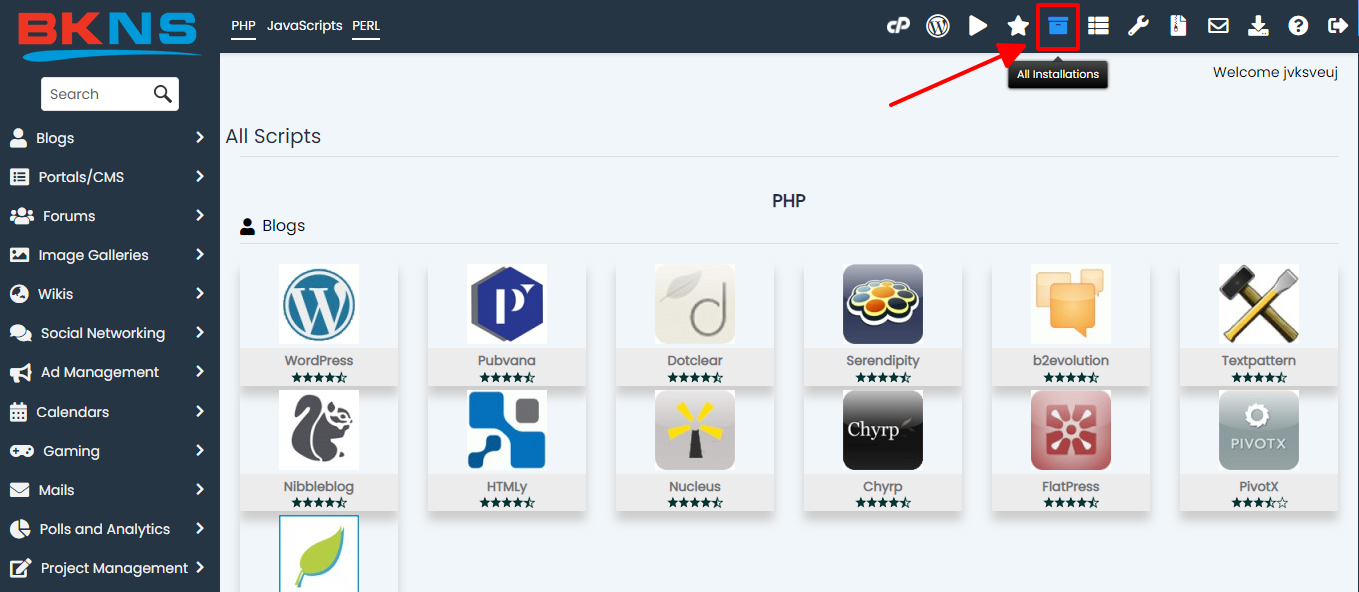
Step 2: You click on All installations
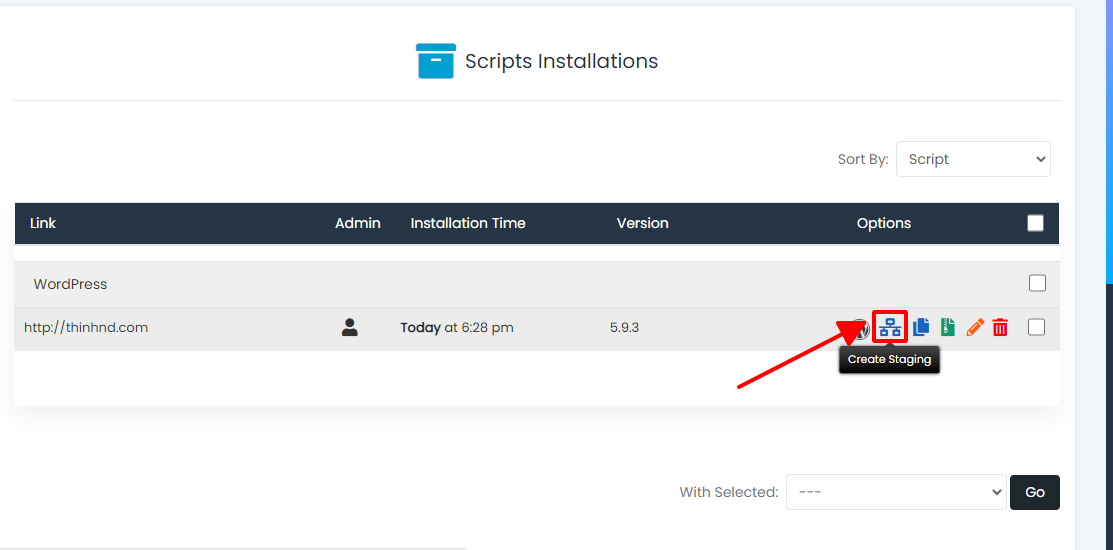
Step 3: You click on the icon create staging
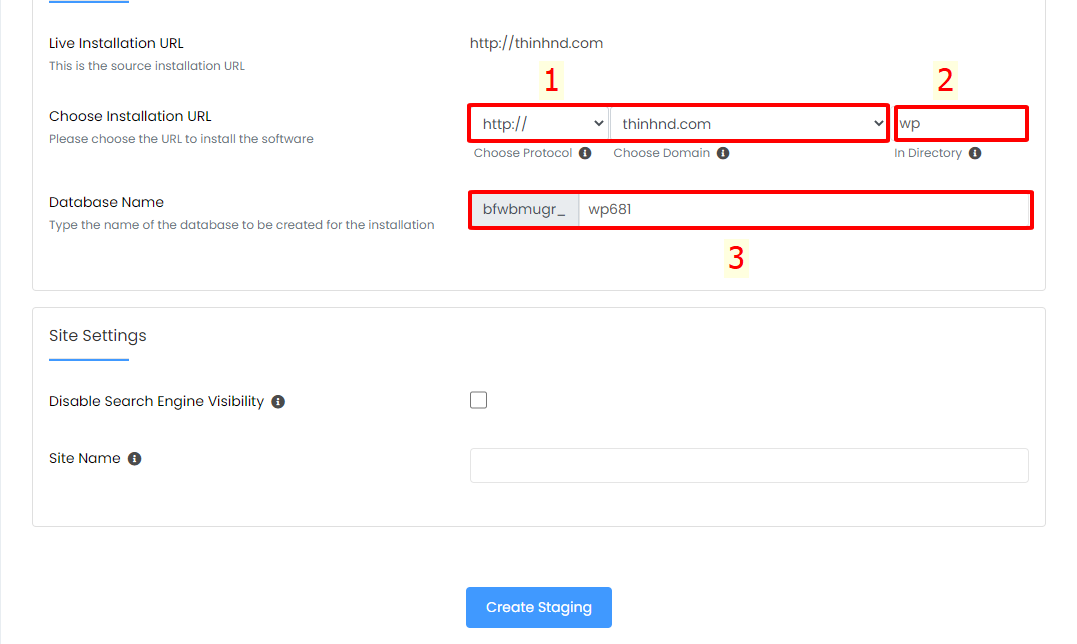
Step 4: You enter the information for the copy website such as:
Box 1: You enter the address of the website
Box 2: You enter the location where the website copy is located, in this article the website copy is in the wp folder
Box 3: You enter the database name for your replica site
Finally, click on the Create Staging box at the end to create a copy for the website
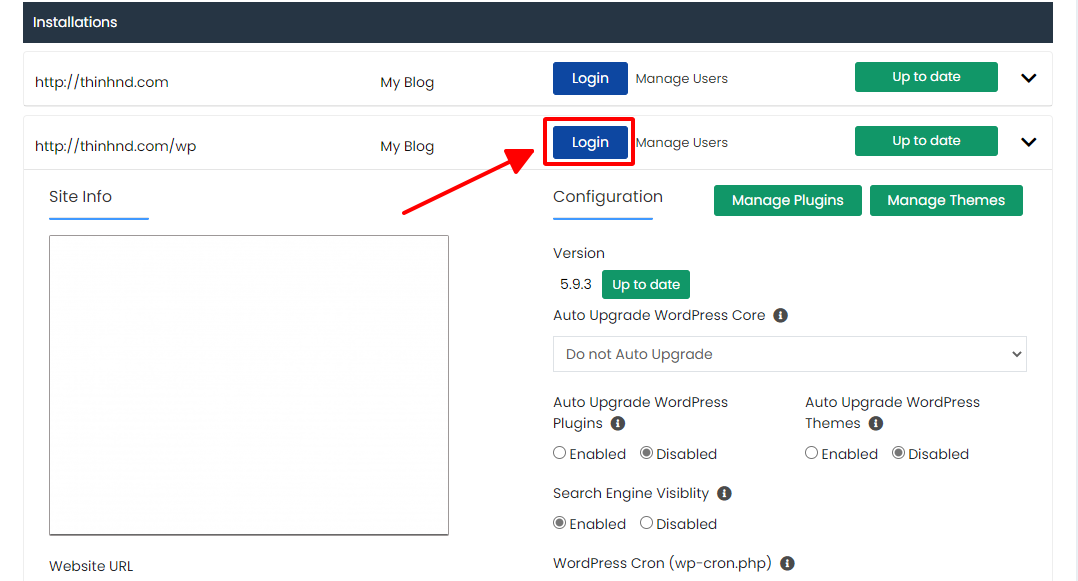
Step 5: Now when you return to the WordPress Management page you can login your copy of your site to make changes like:
- Install/Update Plugins
- Website interface settings
- Update WordPress version
- Add/Edit subpages
- Anything that changes on your site
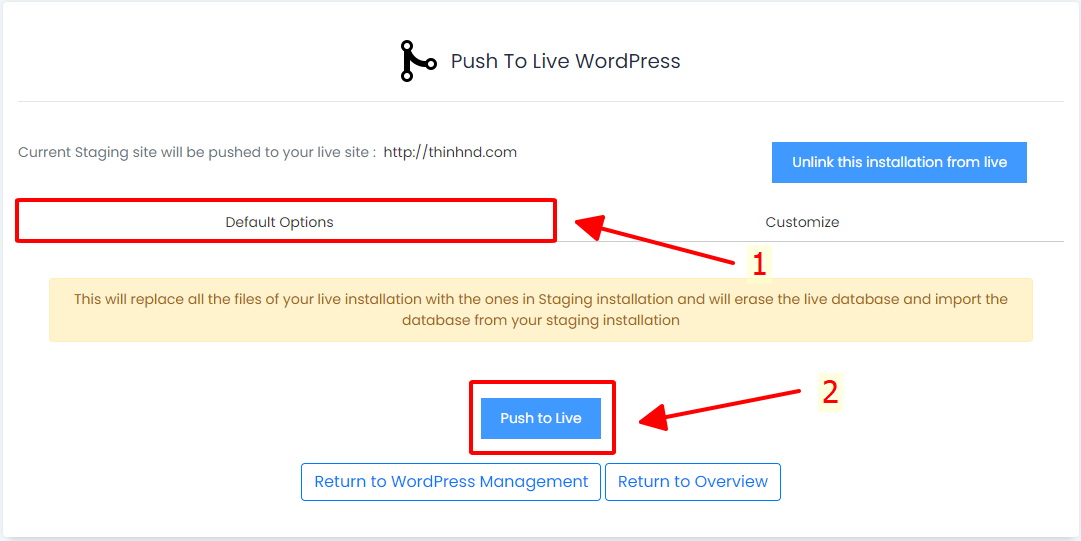
Step 6: When you have run the website with the changed things on the clone site, click Push to Live to apply the changes to your running site.
When you click Push to Live, you will have 2 options as follows:
If you want changes such as files and databases on the replica site to be applied to your running site, this option will:
+ Create a backup for your running website.
+ Overwrite all files on your running site
+ Delete the database of the running website to install and replace it with the database of the copy website
Finally, you press Push to Live
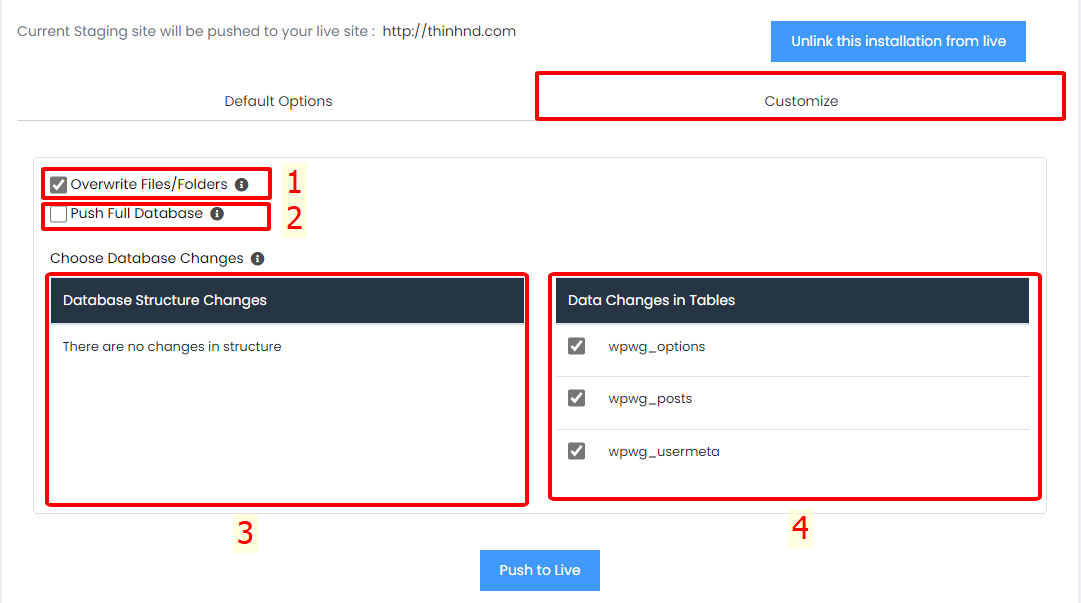
This selection will allow you to choose exactly what changes you want to apply to the running web page. You can:
+ Overwrite file (cell number 1)
+ Overwrite all databases (cell number 2)
+ Only change the database structure (cell number 3)
+ Only change tables in the database (cell number 4)
Finally, you press Push to Live
Hope this feature will be useful to you.
Nguyen Duc Thinh – Technology


")
 Haven't Tried")


Post a Comment
Post a Comment