
In the previous 2 articles, I showed you how to optimize images with the reSmush.it Image Optimizer and Robin Image Optimizer plugins, right? If not, you can follow the link in the reference below. One downside of these two plugins is that they do not support creating WebP images for the free version. Therefore, if we want to use the WebP image format, we will need to install another plugin to add functionality. And the plugin I'm introducing to you in today's article is WebP Converter for Media.
Why should you choose WebP Converter for Media?
- Completely free, without any restrictions.
- WebP image is placed in its own folder (in line with the directory
uploads, calleduploads-webpc), can be easily removed if you no longer need to use WebP image anymore. - Support for creating WebP formats for JPG, JPEG, PNG and GIF images.
- Automatically load WebP images after creation (via a .htaccess file in the directory
uploads), you don't need to do anything more. - Integrated delete features WebP images are higher than the original image.
Create free WebP images with WebP Converter for Media
2. Next, go to Settings => WebP Converter . Here, you will see a number of settings as follows.

Inside:
- List of supported files extensions : tick the image formats for which you want to create additional WebP versions.
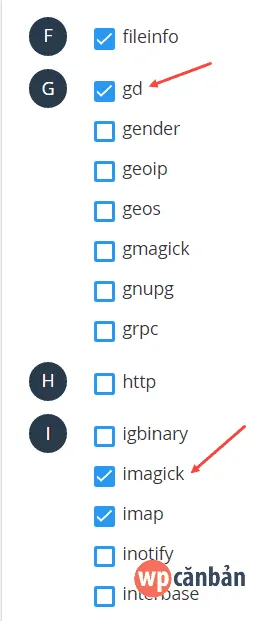
- Conversion method : select the method of creating WebP images (using GD or Imagick module in PHP). This requires that you activate both the module
gdandimagickin the host's PHP. WordPress Hosting service provided by WP Basic has been enabled by default with these 2 modules, so you do not need to do it anymore.
- Automatic removal of WebP files larger than original : Automatic removal of WebP images larger than the original image. You should enable this feature because WebP images are not always lighter than JPG images.
- Browser Caching for WebP files (saving images in browser cache memory) : Enables browser caching for the WebP image format. You should enable it.
- Images quality : choose the quality of WebP image from the original image. You should choose about 85%.
After setup is complete, click the Save Changes button to save.
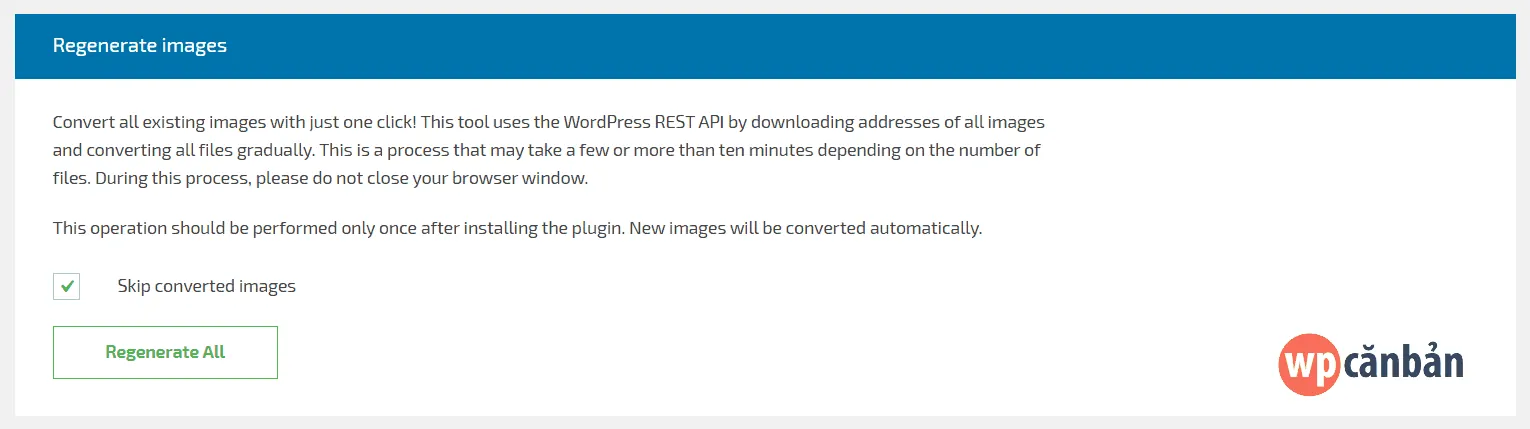
3. Scroll down, click the Regenerate All button to start the WebP image creation process. You can tick Skip to images images to skip previously created images to save time.
4. Once completed, you will receive a notification that looks like this.

5. The last thing is to clear the website cache, browser cache and CDN cache (if any) and then check the results.

It's simple, right? Good luck!
WP Basic is using the WebP image format, and you? Should you use the WebP image format? Let us know what you think in the comments box below.


")
 Haven't Tried")


Post a Comment
Post a Comment